Monday, December 9, 2013

More ALCo's!


I hope everyone had a good Thanksgiving?

Since the last post where I got a shot of the new ALCo's sitting in Malvern, I heard that the W&OV has acquired a few more, but have yet to see them around the shop.  From the scuttlebutt I've heard they scored two more RS11's.  One's in the Central Vermont green scheme and the other is an older maroon Lehigh Valley.  The last one is suppose to be another red Lehigh Valley C420.  It would seem as though they fetched a pretty penny for the two large Centuries?

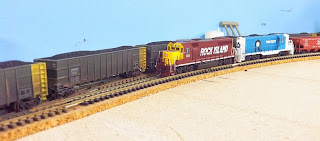
With all this color, they are going to give The Rock a run for their money who has always seemed to have rainbow consists.  Once they arrive I'll get some shots.

*****

Nothing new on the construction in Malvern but I would assume it should be starting again here shortly. 

Since the last ops session in Nov, I took a bit of a break and got some other things done that has been piling up on the workbench.  A friend wanted an HO boxcar weathered so got out the weathering supplies and got after it.  While I had the stuff out I decided to get a few cars of my own weathered up and put them on ebay to see if I could bring in a little extra dough for the holidays.

Just the other day I heard that KATO has announced a new loco, they're F2 A&B's.  One of  the sets that I have my eye on is a pair of Rock Island F2A's in the Red and Black scheme!  I've always been a sucker for this scheme.

While it's from a much earlier time frame than what my layout is focused on now, they will look good with some of the other Red and Black units that I've picked over the years.

This had prompted me to rethink the layout a bit.  No, I'm not tearing things down or changing era's completely, but I do think I'll be thinning out the herd even more than I have been.   With the acquisition of the F2A's I should have almost enough older locos to run within a earlier era, say the early to mid 1960's, the time of my youth.

If I do not have enough locos to fill all the needs, I can always call upon some of the maroon units that I have like GP's, RS's and even a few steamers that are in storage and let them stretch there legs a bit.  I have gaggle of LifeLike FA's in the Red and Black scheme as well as some undecs that will be painted in the solid maroon or maroon with stripes for more variety.

I don't think I will have to swap out any buildings or signs as the era will be close enough that it shouldn't matter.  The only thing that might look kind of funny would be seeing FT's pull some modern 5800 cuft plastics hoppers, but such is life.  Who knows, you might even spot a Blue and White geeps mixed in the consist with some FA's?

Back the layout, my next major project will be to finish a few more buildings so that I can get their foot print figured out and I can some grass down.  I just about have the Heavy Metal building ready and the next will be the Olin-Chlor plant in the corner, followed by Frump Gas & Supply in the middle of the old Wye just outside of town.

Stay tuned...


Sunday, November 3, 2013

The rumors were true.


During the last couple of trips to Malvern, I had heard rumors that the W&OV was looking to replace their two large ALCo Centuries [a C628 & C630] with three smaller ALCo B-B units.

Yesterday I heard some chatter coming over the scanner that there were some new visitors in Malvern.  I grabbed my camera and made a mad dash to the engine shop.

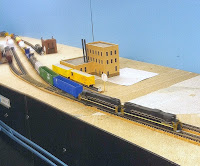
There..... sitting on display were three smaller B-B ALCo's.  One RS11 bracketed by two C420's!  They are of course all second hand units, but what a sight for ALCo fans!  These were so new they haven't even received their new markings yet.  The first one is a Lehigh Valley yellow jacket, the RS11 is a Maine Central and the second C420 looks to be an ex Lehigh & Hudson River with CR paint-outs still in place.


The two big ALCo's are still sitting on the far track and I wonder how long they will be around or before they get shipped off to their new owner?  Better try to get some shots while I still can.

I got talking to the engine house foreman who let it slip that the old D&H RSC-2 might also be replaced.  He said they were looking at a smaller ALCo switcher, he mentioned something about it being an S-2?

An added surprise was the yellow caboose tacked on behind the L&HR unit.  It looked like it might be an ex-MoPac caboose that got painted in the Borg colors?  I didn't see any markings on it other than the road number.  This should make a nice replacement for the old North Eastern style crummy that they had been using.  I bet the crews will be happier.


 *****

I've always been a fan of ALCo's and thought this would be a good chance to show my love for them.  I had the two Centuries for some time now and they worked fine but they just seemed to be just a bit too big for the little short line.  

I picked up the L&HR from a buddy who was thinning his herd and thought if I could find a couple more that these might be the ticket.  What I really wanted was an RS11 in the Lehigh Valley Cornell red or maroon scheme, but I stumbled across the Maine Central and since yellow weathers real nice, I thought I would give it a try.

I plan on weathering them up pretty heavily but leave the original road names & numbers in place and add a small stenciled W&OV  under each cab.

The caboose is a Bluford Shops ex MoPac that got repainted after the merger.  I thought a yellow caboose would look good instead of the typical "Red Caboose" plus these are super nice models!

I suppose in the real world time frame that I'm modeling [1983], the Lehigh Valley Yellow Jacket would have not been the proper scheme for a second hand loco as this was not the last scheme that these wore, I believe it was the Cornell Red.  But then again the Rock wasn't around in 1983 either! Maybe I'll have to keep my eye open for another LV C420.  I think Atlas has announced a C420 or RS11 in Cornell Red or Maroon.

If anyone has one of these that they'd like to part with, I bet the W&OV would be interested.


Saturday, November 2, 2013

Sounds of Construction in Malvern, part 6


After a month of working on the Crushmoore building I think I've reached a point where I can call it good and move onto the other buildings in Malvern.  There's still a lot of smaller details left to be added such as piping, weathering and misc items which I can do at a later time, but at least now I can get it located and start in with ground cover.  I still need to add a small parking lot on the right side by the office, this I want to try using some roofing felt for an asphalt lot.

The last thing I added was the roof top details.  These were all made with LEGOs except for the Air Conditioning unit on the office, I think this was a Burt Industries detail. After gathering all the pieces I wanted, I glued them together and painted them an SP Lark gray and added silver to some of them for a bit of variety.

Using LEGOs for details is a great alternative to buying pre-made details and the possibilities can be unlimited.  What a great idea!


While this may not be a masterpiece of a model, it has taught me that scratch building is not as hard as I once thought.  It can yield a unique structure that you can't otherwise find on the open market and one which you can fit the area that you have.

This was a fun build and I'm looking forward to doing more of the same throughout the layout.

Thanks for following along.


Wednesday, October 23, 2013

Sounds of Construction in Malvern, part 5c


Some guys who go through their second childhood buy expensive sports cars or motorcycles, others buy boats, but no, not me..........I buy Legos!

I finally got a chance to use some of the Legos for detail parts as Rich has done.  I wanted to get a motor and cyclone put on top of the collectors to finish them off. 

At first they looked a little strange with all the bright colors, but with a little imagination and assembling them in an unconventional way [gluing them] I came up with something that could pass for what I was looking for.


After the the glue dried I sprayed them with an Oxide Red for a primer and base coat.  The second coat was Floquil's Old Silver which I didn't cover with a solid coat.  I wanted just enough silver on so that the Oxide Red would show through in areas to give it a look as if the silver was wearing thin.  I also painted the pad with a concrete color.


The duct work was made with sprues from old kits.  I heated them with a lighter just enough to stretch and bend them into shape so they would enter the building just under the facade.  I just glued the duct work into the square holes on the back side of the Lego. 


Monday, October 21, 2013

Sounds of Construction in Malvern, part 5b


Things have slowed a little in Malvern since the last post; Chores on the home front and waiting for some parts.

I did manage to get started on the dust collection system.  I'm waiting for some parts to arrive so I can finish these and get the canopy built over the conveyor. 


I need to get a concrete pad in place, the motors placed on top, run some tubing into the building and then try to come up with some kind of a discharge chute so I can empty them into a truck.


Tuesday, October 15, 2013

Sounds of Construction in Malvern, part 5


Along with all the new construction on the Crushmoore plant, Heavy Metal Co. is finally getting their canopy erected.

While some of the paint was drying on the Crushmoore loading shed, I turned back to Heavy Metal Co. to see about raising the canopy over the unloading platform, which is where I left off before the last ops session.


I added to one of the original sections of the upright bases on the right side so I could have a larger concrete pad where I can have fork lifts and stacks of coiled steel.  I used more Evergreen sheet stock for this that was scored with 1/2" x 1/2" grids to simulate a concrete pad.  It's kind of hard to see in the photo though.


The next thing I need to add are the two rails that the overhead crane will ride on.  It's unfortunate that Walther's never included a gantry crane with the N scale kit like they did with their HO version.  They offer one, but it's no where near the right size for this kit [or at least the one I got years ago is not].  I guess I'll need to scratch build one or kitbash one out of the so-called "N" scale kit I have.  I don't think it should be too hard.

Once I get that done I'll be able to glue this section in place.  Then I can get after the main building;  Add the roof and also cutout a section for a double garage door on the left end of the building, you can see where the two windows are missing.  This will be where the raw material will enter the building with fork lifts once it's unloaded off the railcars.


Monday, October 14, 2013

Sounds of Construction in Malvern, part 4


This was a good weekend for me, I got quite a bit done at Malvern!

After getting the main building to a good stopping point I decided to tear into the chip loading shed.  I got it partially assembled and then painted Saturday night. Sunday after I got the chores done I found some time to get it assembled and test fit.  I still need to get the roof painted and then I'll need to add a foundation to the bottom of the base of the building,  There is no cork under the siding so I as it sits now the cars just fit under the opening! I also got some blocks of wood cut and shaped for a couple of dust/chip collectors, that will be another small thing to tie up.


While waiting for it to dry I got thinking about the conveyor I needed that will bring the logs into the plant.  I jumped on my old friend Google and started to research conveyors and came up with several ideas.
I went back down to the laboratory and started to rifle through some styrene.

I started with a strip of balsa wood for the base and then added a couple of  styrene "U" channels to each side so that I would have something to glue the sides to.  After getting the sides glued on and knowing that the unit will be sitting back away from the front edge, I thought I might be able to get away without building an actual conveyor bet.  Once it was together, I just painted the balsa wood floor with a dark gray acrylic and viola!  Instant conveyor belt!  Once I put a few logs on the belt, you'll never even see it.
I also need to make a small shed to house the power unit for the conveyor or maybe just a small power unit to sit next to it like  a small gas or diesel generator?


Now I need to look at building a small canopy over the conveyor to keep the weather out. 


Friday, October 11, 2013

Sounds of Construction in Malvern, part 3


After getting the siding glued into place, I decided to use a spray bomb of Rust-Oleum to paint it with.  I found a nice neutral color called "Fossil", it looks like a sand color with a tinge of yellow.  For the windows, doors and facade I chose a chocolate brown which I thought would be a nice contrast to set things off a bit.  At this point, I'm not sure I will add trim pieces to the corners of the building or not as it might be a bit too much.

I glued the windows, doors and facade to the building using the same Loctite glue I used to for siding.  The Rust-Oleum has a Satin finish so I will need to spray the whole building down with a nice flat finish before I can start any weathering.

For the roof I used some Wet/Dry 320 grit sandpaper and glued it down to the roof


The next thing I'll need to work on is getting all the roof and building details ready to assemble and attach.  I think some vertical storage tanks might be in order as well.

Overall I think this will work very well for a building technique.  I'm not sure if it's that much cheaper than buying a commercial kit or not.  So far not counting the plywood and my time, I've got close to $62.00 in the glue, styrene, paint, windows, doors and the Legos.  But at least I have a unique building that I can make fit to an area that have.

If you have a bunch of old building parts laying around that you can put to use, then it might be cheaper.  Unfortunately, I didn't.


Thursday, October 10, 2013

Sounds of Construction in Malvern, part 2


After getting the building cut to size and seeing that it will fit the location, the next job was to add the styrene corrugated siding.  Never having done this before it took a little planing to skin the building.  I adopted my woodworking skills here again and started laying out the sizes so as to optimize the four sheets I had to work with.  As I was doing this I began to wonder what would be the best glue to use for the siding?

I did some research and posted some question on the forums as to what others have used.  Rich used CA glue to stick his siding to his buildings but I hesitated about the lack of time needed to position the pieces.  Others offered ideas of using CA glue, wood glue, liquid styrene glue and water based construction adhesive.


I liked the water based construction adhesive idea the best but had hard time locating any locally, It's made by Titebond,  Green Choice Construction AdhesiveWhat I came up with was a water based adhesive glue made by Loctite called "Stick'N Seal"  Basically it's a heavy adhesive caulk, similar to their PowerGrab caulking.


I applied it like contact cement, applying it to the surface of the building, then pressed the styrene to the surface and then removed so it could dry and tack up a bit.  When I reapplied the siding to the surface it attached with a strong grip, but yet it gave me enough time to position each piece.  It works like a slow setting contact cement.  
I picked up some windows and doors from Tichy Train Group and cut out holes for them to fit.  Before gluing the siding into place I used a black Sharpie marker and colored the surface where the windows would be and then glued the siding in place.


The corners came out pretty good for my first time but I might go back and either try to fill them or cover them with a corner bead once I get things painted.


Tuesday, October 8, 2013

Sounds of Construction in Malvern, part 1


With Ops session 6 behind me, I have decided to return to Malvern to continue with the scenery.

Not having completed the Heavy Metal building yet [which was my last project in Malvern], a new fire got started under my butt.  About a year or so ago I ran across a post on one of the forums that I belong to where the poster explained how he built a rather large industry on his layout using plywood then covered it with sheet styrene.  The best part of his build was the way he made use of Lego parts for the roof detail and other details on the buildings.

In my opinion he has done a wonderful job executing this build to a very believable, very large industry without a lot of expense.

Here is a link to Rich's post on The Railwire.

After seeing this it got me thinking that there was no reason I couldn't do the same thing with a decent result.  So I set forth.

Crushmoore Ind. is a Pulpwood plant that resides in Malvern, AR.  It's the largest industry in Malvern so I wanted it to be the dominating structure in town as well.  After seeing the size in Rich's post of his Asphalt and Paper plants, I knew that the "Milton A. Corp. MAC" [PikeStuff] kit that I was planning to use just wouldn't cut it any longer.

The first thing I did was to take some rough measurements in Malvern, then I used SketchUp to get a general idea of what I wanted.  After that it off to the shop to make the general build and see what I could come up.  No, I didn't do a mock up of the building first with cardboard like he did, but being a woodworker by trade, I had a good idea of what I wanted and how I wanted to build it.  This is what I came up with.

The overall size is approximately 23" long x 3" tall x  5" deep.  The head house is 3" x 3" x 5-12" tall.


Once I got it home and set in place I seen that I needed to cut off 3/4" off the backside of the structure so I had enough room to fit an unloading shed in front of it. These were taken before I removed the 3/4" off the back.


I originally planned to have the small, long setback be where the pulpwood logs would be loaded in to the factory, but after setting it into place I can see that it's too close to the tracks for my liking.  I might make this a place where I can back a tractor trailer under it so bark and scrap can be loaded into the trailer by means of a gravity or drop fill.  

I might need to make some kind of a covered loading bay for the logs against the backdrop to the left of the building now, which should fit the footprint better.  


Sunday, September 8, 2013

Videos from Ops session #6


After getting a new computer and getting use to the video editing program, I finally have a few videos to post.  While they are not the best, at least I got some practice with the camera and editing software.   I need to work on some lighting and then once I get some scenery down in places, they should look better.


Tuesday, August 20, 2013

12 hrs on the Little Rock line; Op session #6


All in all we had a very good run that night.  I wish I could say the same for the pictures.  I used my iPhone instead of my normal digital camera and some of the shots came out kind of blurry, please forgive me.

We'll follow along with each train as it makes it's run with the pictures that I was able to get. 

As they say on the forums;
                         "Pictures or it didn't happen"

Calvin [middle] eases the first of the four manifests trains, the NB LRMP-W to a stop on the main and prepares to drop a cut of cars as Don [left] and John [right] brings the first cut of  outbound cars from El Dorado yard to the A/D tracks. 


After shoving the outbound cars to the A/D #2, John realigns the turnout to A/D #1 as Don makes the cut on the LRMP-W  while Quin looks on.


After hammering the ICG diamonds at Ruston, LA, train LRMP-W takes the cut-off at Tioga Jct as it heads for Alexandria, LA.


Quin is giving Calvin instructions on how to acquire the next train; the NB MPLR-W


As Calvin brings the NB MPLR-W into El Dorado, Don and John are getting the next batch of outbound cars readied.


Making the cut,


With the in bounds set out, Calvin goes after the out bounds, while the El Dorado switcher gets the yard tidied up.


After the work is done in El Dorado, the MPLR-W heads north through Calion, AR. and then through Fordyce, AR.  Doug is giving Roger a helping hand with the W&OV switcher as he gathers his cars in Malvern.


Train MPLR-W swings around the engine facility at Biddle yard in Little Rock.


A poor grab shot of a much sought after train on the Little Rock Line; The W&OV's Razorback.  I caught it as it was cruising through Fordyce as it makes it's run south to El Dorado to exchange cars with it's two big second hand ALCo centuries.  Rumor has it that these will be retired shortly and replaced with three smaller ALCo's. 


I take my turn at the throttle as I head Amtrak's NB Rebel through Tioga Jct.


Bringing the Rebel to a smooth stop at the El Dorado depot we see the Razorback waiting on A/D #2 while the yard goat is shoving it's new cars onto A/D #1.
Notice the look of concentration on Don's face!


With it's run finished I return the Rebel to it's track in the staging yard.


After returning to Malvern, Doug [front] continues to assist Roger [rear]  as he begins to make the set outs with the Malvern switcher.


A mishap at El Dorado couldn't have come at a worse time!  While getting the cars assembled for Winnfield Turn, the yard goat either found a bad section of track or the local vandals laid something on the rails!


The big hook is brought in.


After the clean up has been made, it's back to work as usual in El Dorado.   Don and John finish getting the Winnfield Turn assembled.


Quin is getting the power ready for the Winnfield Turn as the yard goat digs out the cars from the Pool Track for the rest of the cars needed on the local.


A GP7 and GP40 will power the Winnfield local today.  They make a run down the main to the south end of the yard where they'll tie onto their train as John shoves the crummy into place.


The first stop for the Winnfield local is Dubach, LA.   Quin takes the siding and then assess the situation. The first move is to set the crummy on the team track near the Piggly Wiggly Distribution center.


As Quin continues to work Dubach, the NB MPLR-H [the third manifest of the session] swings through the big "S" curve in town.


After making the cut at El Dorado, I pull the MPLR-H north out of town.


Big smiles from the crew of the SB LRMP-H as they begin their southbound journey.  Roger [rear] and Doug [front].


 A NB Rock Island through freight crosses the ICG diamonds at Ruston, LA as it heads for Dubach, LA.  Let's hope the Winnfield turn has the mainline clear.


The Rock Island freight takes the passenger siding at El Dorado for a meet with the SB LRMP-H.  With the caboose in the clear and the turnouts re-aligned, the freight throttles up as it leaves El Dorado.  Roger then waits for the cut to made before shoving the cars onto one of the A/D tracks.


Trundling along northbound, the Rock Island freight passes Dixie Woods and Flappers in Fordyce, AR.  This pair of RI FP7A's are now racking up revenue miles on their new home rails after being transferred from service from the old Illinois Division layout of Steven Johnson [now the Ottawa Sands Division].


With the cars tied on and the air pumped up, Roger pulls the LRMP-H south out of El Dorado.


On it's return trip to El Dorado, the Winnfield Turn works the final job at Dubach.  Loaded plastic hoppers are being set out at the ARKLA Distribution spur, then ties up on the main.


With an unusual occurrence,  the Winnfield Turn is forced into "the hole" on the main.  The SB LRMP-H has to roll through the siding at Dubach.  It sounds like Quin will be sitting there for a while as there is some chatter coming over the radio that the SB North Western Stack train is close.


A few minutes later, we catch the stacker as it leaves the south end of Dubach siding.


A little while later there's more chatter over the squawk box which announces a SB MKT coal drag that is passing through Haskell and a NB detour train; a Seaboard System auto rack.  Both are on their way to El Dorado.  The passenger siding at El Dorado is the only siding long enough to hold through freights, but the coal train is normally longer than the siding.  I smell trouble coming.


The coal drag gets to El Dorado first and a miscommunication sends it into the siding while the Rack train heads down the main.  As figured, the siding is too short and the SBD caboose just doesn't have enough room to clear the south turnout.   After a bit of head scratching and grumbling, the decision is made to back both trains out of town.  Fingers are crossed with anticipation that a saw-by won't be needed!

Time is running out for the crew of the Winnfield local who is still sitting in the hole at Dubach as the two long trains make their reverse moves in town.

After needing to bunch the slack out of the auto rack train on the siding, the Katy units are able to just squeeze past the SBD caboose with inches to spare!

    
Everyone breaths a sigh of relief as the coal drag leaves town.  A passing news chopper hears about the commotion and swings overhead to snap a picture.  El Dorado yard is empty and the mains are full of trains as the yard crew continues to build the Haskell Turn.


Finally!  The Winnfield crew makes preparations to get under way for final leg back to El Dorado as the KATY coal drag rolls through the siding at Dubach.


Nearing the end of the session I find Doug at Haskell, AR. with the Haskell Turn working the Riceland plant before heading back south to El Dorado.


One more drop.  The Haskell Turn makes the last set out at Calion Lumber Co. in Calion, AR.  


The day draws to a close as the Haskell Turn enters the yard at El Dorado and pulls down A/D track #2.


Something tells me that Roger isn't happy that the session is over or maybe he just doesn't like his picture taken?
 
The Blue flags are hung. 


As I said earlier in the post, everything went very smooth on this session.  
The few exceptions were:
The incident with the El Dorado yard goat.  I actually had to replace the two MP15DC switchers with the ex-Rio Grande GP7 due to a mechanical failure, one of the chips decided it didn't want to play anymore.

The meet of the Auto Rack train and the Coal drag, which shouldn't have happened, but I think the trains may have gotten ran out of sequence.  As it turned out, it just added to the fun!

One of the UT4r's kept loosing connection with the wireless Loconet.

Finally, there were four cars called for the EL Dorado switch trick that never showed up.  This was a new job for this session.  I later found out that they didn't get thrown into the yardmasters list on the Wheel Report.  This was my fault as the formulas never got programmed into the system.  I'll be working with Quin and Steven to get this resolved before the next session.


We started out a little short handed this session with only 7 members present.  Half way through, Calvin got called away, that left 6.  With Don and John teaming up in El Dorado and Roger and Doug working the W&OV, that left several openings for jobs.  Judging things on the session, I think I can safely say that we could handle 8-10 members total per session if they were teamed up in two man crews for each of the 4 working manifests and the W&OV.  The through freights and the two smaller jobs; the ICG interchange and the Riceland job would still only need a one man crew.  It might become a little crowed, but I think it could work.

I also have a few videos from this past session, but I need to get them cleaned up and uploaded to YouTube first.

Thanks for following along.