A proto-freelanced N scale layout depicting Subdivisons 38 & 39 of Rock Island's Southern Division.
Sunday, October 13, 2024
More roadwork in Ruston
Thursday, October 3, 2024
Louisiana DOTD
I gotta say them boys did a fine job and was quick.
After getting the cork fit and glued in place around the depot and parking lot I went back upstairs to work on some other items. About four hours later I went back down to see how it turned out. Gotta say I was surprised at what I found. I think I actually found another reason why layouts are considered never finished.
After getting it glued in place I found several things with some weight to help keep it flat while the glue dried. I used a bag of birdshot and a couple of new bottles of 91% alcohol. Everything had more than enough weight to keep the cork flat and that worked great.
But for some reason, both new bottles of alcohol decided to leak a little bit while laying on their sides, one on the cork the other was right over my new highway!
First, here's the new cork glued in place.
I didn't get a pic of the actual puddle, but I did get one of the aftermath and the repairs.
The first pic was after wiping most of the gunk off the surface. It took everything off except the auto primer that I used for a base coat: acrylic paint, pan pastels, Dullcote and the Tru-Color paint I used on the lines. First thought was to try and weather it and blend it back in, but quickly decided to repaint it and try to make it look like a newer concrete repair.
Cleaned and feathered the edges
Masked it off and painted it with a lighter color.
I followed the same method that I did originally, painted it, painted the stripes, added tar lines around the edges, then weathered it slightly for a look of a little use.
Overall I think it turned out ok and now the road kind of has a backstory to go with it.
Now I can proceed with the work of getting the crossing signals installed.
Monday, September 30, 2024
Roadwork in Ruston
Sunday, September 22, 2024
A train is a coming...
so one needs lights and bell.
A few months ago Showcase Miniatures released a Model 10 crossing signal in N scale. I had to have a few thinking this would be an awesome addition to the layout? After getting the highway made and installed, I decided it was time to test my sanity.
These kits are fantastic. They come with everything you need along with a few options for signs, such as the number tracks and different length crossing arms. They even include a preprinted paper with signs and colored arms that you can cut out and apply to the proper items.
They are of course, a little tedious to assemble but frankly, quite easy. This is the first time for me assembling something like this and I didn't have much trouble. That said I didn't make it through the first one without loosing one small part.
Once assembled, I got it painted and then applied the paper cutouts for the signs.
I also had dreams of making them lit, well let's just say I'm still on the fence about that. I did manage to drill out the light cases so as to thread the wires through them, I picked up some Red 402 LED's and I was talking to a buddy who loves to make electronic controllers. So if I don't lose my mind before I'm finished, I should have these working as well. Which will be a first on my layout.
I opted not to use the crossarms for this location, the line does not see a lot of trains, so this should work.
Monday, August 26, 2024
Weathered Highway
After getting the
crossing stencils and STOP lines applied with an airbrush, it was time to add
some weathering.
For the overall
weathering I went back to my trusted weathering medium: Pan Pastels. I
used a light gray to help fade the stripping a bit. For the tread paths I
used a bit darker gray and mixed it with the light gray and worked them in with
a soft brush to keep them from becoming too heavy.
Along the outer edges of
the highway I used a light brown pastel to give it a dusty look from the dirt
shoulder.
The oil spots near the
crossings were made with a Soil Wash from Rail Center by MIG. I used a
small stiff brush, loaded it with the wash and shook most of it off. Then
I took a dental pick to gently pull back the bristles and let them "Flick"
some of the wash onto the surface. The cracks/tar lines were made using a
fine tipped calligrapher’s pin, dipped in black India ink.
Now I can continue with the base scenery.
Sunday, August 25, 2024
Railroad crossing stencil
Sunday, August 18, 2024
Highway striping
As for a "Crossing" stencil on the highway surface, I'm still playing around that. I acquired an old S&S models brass stencil and a friend actually 3d printed me a stencil.
Monday, August 12, 2024
Styrene Highway
Started on the actual styrene for the highway at Ruston over the weekend.
I used a styrene "No Parking" sign that I picked up at Menards a few years ago. It's .020" thick so I doubled it up to make it .040" thick.
I cut it larger than I needed and then trimmed it to fit. Right now it's about 2-1/8" wide which works out to about 28' wide. So I think that would be two 10' lanes and a bit left over for outer stripes.
Once they're painted and glued down, I'll bevel the cork for a shoulder.
They got shot with a primer for the gray base coat.
Sunday, July 7, 2024
Highway crossing at Ruston, LA
With my visitor gone and the Fourth now past, I had some time this weekend to get back to the layout.
The first thing I did was to work on the private farm drive by adding some earth colored grout for the drive and crossings. It's drying as I write this so I'll see what it looks like tomorrow.
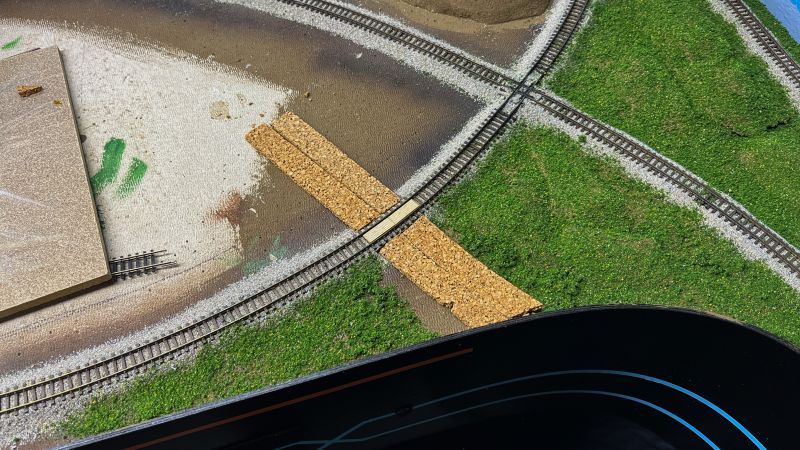
The next thing I worked on was the highway crossing at Ruston, LA. Now like most things on my layout, this in not the prototype location as the depot and ICG diamond was in the middle of Ruston. I have this set just outside of Ruston, so this is my rendition of a two lane blacktop.
Checking on road widths, I came up with a road of 24'. That's two lanes of 10' with 2' past the outer lines, plus I'll add rock or dirt shoulders when the time comes. For now it looks pretty close.
I started off cutting some cardboard to 2" wide to mock it up and then I found some cork that I used for the roadbed to keep the road elevated to match the track so there was little to no incline to the rails. I cut the cork 2-1/2" wide so I could add some shoulders to the highway.
This width seems to match up pretty close to the Blair Line crossing I chose. My plan is to use some 0.30" styrene for the actual road, much like I did on the scrap yard driveway.
Sunday, June 23, 2024
Roads less traveled
![]() |
Thursday, June 20, 2024
Union Scrap crossing
I started to get some ground foam down and then realized a little
too late that I needed to get the crossing installed first. While the
glue was still wet I swept the ground foam away from the area where the road
was going to go. A couple of nights later I gathered up the tools
and the wooden crossings needed and started the process. I wanted to try
using styrene for the road.
I've always been impressed with the look of the roads that Dave Foxx made on
his layout, so I thought I'd give it go. I did use styrene on another
crossing in Haskell that worked out pretty good, I got it painted but never
finished it off for some reason?
I first removed the inner spike heads in this area of track so the
crossings would fit. I used two single width crossings. I angled
the ends a bit to account for the radius, then I removed the
ballast next to the track.
I planned to keep the road pretty level leading up to the crossing
from the fascia and then let it slope down into the scrap yard. I used
the same thickness of cork that I used for the track roadbed and then chose
0.30" styrene which will keep it just under the railhead so I won't be so
apt to scrape and scuff it when I clean the track. However this section of
track will be modeled as track that hasn't been used in years, so I shouldn't
need to clean it much.
This is also the same section of track where I leave some MOW cars
sitting during Ops and they won't block the crossing, so it shouldn't be a
problem.
The following images are just for pictures, nothing is glued down
other than the cork.
Removal of the spikes and ballast shoulder.
Crossings laid in place.
Cork positioned and glued.
Styrene cut, fitted and laid in place.
It's kind of hard to see, but if you look close at the front rail, you can see the top of the railhead protruding above the styrene.


.jpg)