Wednesday, February 27, 2013

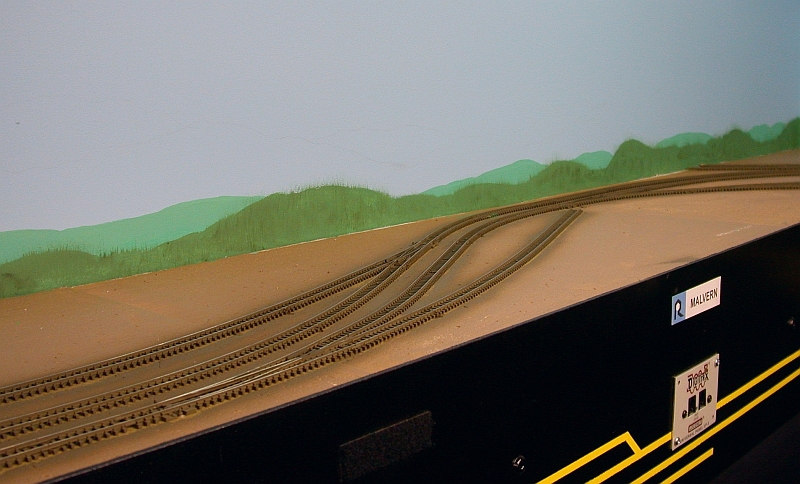
A closer look at Malvern

Since I'm starting to get the scenery going in Malvern I thought I would give you a detailed look and history of  Malvern.  It might make it easier to follow along rather than just reading about the town and industries.

Conception of Malvern

From the time I started thinking about building a layout I have always had it in mind that a layout would not be complete without some sort of branch line.  Be it a short piece of track to drop cars off  for an "Off-line" destination or a full blown town with industries to serve.  The area of the room that Malvern resides in lent itself very well for a branch line.   

History of the W&OV

While designing the layout, I knew I wanted to include the little short line called the W&OV [Warren and Ouachita Valley RR].  The road actually existed and connected to The Rock Island at  Banks, AR. 


They were basically a lumber hauler that was owned by the stockholders of the Arkansas Lumber Company and the Southern Lumber Company, both of which have mills on the line.  One of their locomotives was a 10 wheeler.


In 1948, the Rock Island purchased the Warren and Ouachita Valley Railway and assigned a Rock Island Whitcomb  75DE12c #1013.


Proving not to have enough power,  the little Whitcomb was replaced with a Rock Island EMD SW-1 #539


Disclaimer:
I borrowed all of the above photos from the internet and the information came from various sites as well.
The information may not be 100% correct, but it's close enough for my purposes

Since the original W&OV was purchased by The Rock 1948 that meant I had to re-write some more history.  So, in my history book in 1979 when The Rock started to shed their branch lines for capital, they sold some of these lines to a newly formed short line who re-used the original name; The W&OV.


Rewriting the History books

One thing that I enjoy about modeling is not only building a layout, but also trying to build a history as well.  To me this seems to make the layout a little more plausible.  So this is what I came up with;

 This was taken form my first post.

The re-written history (according to me)

In the early months of 1979 as bankruptcy was drawing near, The Rock started hauling the seafood North from the Gulf and actually made a small profit from doing this, but they needed more capitol.  They decided to start shaving off the mainline, down to the bare minimum and sold off two portions of the line to the newly formed W&OV.

The first section to be sold off was the original line that the original W&OV had operated: Banks to Warren and the remaining section that connected to Tinnsman Jct.  The second section was the branch that started at Haskell, AR and ran West to Hot Springs, AR and South to Sparkman, AR.
After the purchase of these two separate sections, the newly formed W&OV moved their headquarters to the northern section and setup shop at Malvern, AR. They also received trackage rights to run between these two lines and interchange with The Rock at El Dorado, AR with a train they nicknamed The Razorback.


Designing Malvern

With the history all re-written, it was time to start getting a track plan that would fit in the area I had to work with but nothing overly complicated.  I wanted several industries that could be found in the South as well as any small town USA.  I also based these industries on some of the rolling stock that I had and wanted to use; tank cars, wood chip hoppers, pulpwood flats, coiled steel cars, bulkhead flats, gondolas and open hoppers.

The first was a chemical plant which are common in the South.  This would become Olin Corp, a company that would produce Hydrochloric acid that would ship and receive tank cars.

The next would be a forest product based industry, I chose a pulpwood plant that received loaded pulpwood flats and shipped out loaded woodchips; Crushmoore Ind. 

For use of coil cars, bulkhead flats and gondolas I had the Walthers Vulcan Mfg kit, this would become Heavy Metal Ind, fabricators of steel products.  They would receive loaded coil cars, bulkhead flat and gondolas of steel.

I also wanted a quarry [modeled as siding] that used hoppers to supply an online cement company in Dubach, LA with aggregate. These hoppers would be captive service cars that would never return to the main yard.

The last three were industries that could be found in any small town USA; 
An LPG dealership; Frump Gas & Supplies.  They would receive loaded LPG tanks.
An implement dealership; McClehaney Equip. Co. Loaded flat cars and boxcars with implements and supplies.
The last one is a paper recycling company [further down the line, also modeled as a siding as well].  Empty boxcars would be delivered and loaded with bails of paper and cardboard.

Now, knowing what industries I wanted and what types of cars to use, it was time to get the track plan worked out.   As I said earlier I wanted something simple so I based it off  a single track main with at least one siding, something most small towns would have.  This would allow me the ability to make "run around" moves so as to access all the spurs which would be facing both in directions. 

The W&OV track is in purple.


Once I got the track in place I could now figure the max amount cars for each siding/industry.   To make sure I had enough room to work, I made the siding in Malvern as long as I could get it,  better too much than not enough.

Operations of  The Rock

The Little Rock Line has two daily locals that originate out of El Dorado yard. The Haskell turn [North bound] and the Winnfield turn [South bound].  Each turn originates at and returns to El Dorado.  Having decided to run the locals as "out and back" runs from El Dorado, I needed at least one siding at Haskell and one siding at Winnfield to accomplish this. 

The Haskell turn

In my original design I had planned for a full Wye and one siding at Haskell, this would allow me to turn the locos and run around the train via the Wye.  After running a few trains in my head I decided to forgo the full Wye and make one leg a stub ended siding and model it as removed, which I thought would add a little more visual interest to the scene.  I designed Haskell with one siding that connected to the remaining leg of the Wye leading to Malvern.  This would still leave me with a "run around" ability, but would require the Rock Island locomotives to travel on some of the W&OV trackage.  So an agreement was struck for this movement.

In the process of laying the track I had a thought that it might be nice to have a second shorter siding at Haskell for extra room if needed.  This turned out to be a good idea as the W&OV also needed to serve McClehaney Equipment and could slip by anything setting in the main siding.  This also proved to served as an optional Arrival or Departure track for the W&OV if needed.

Originally I had planned to have the Haskell turn deliver cars to the W&OV, but it was nixed after we ran the first test session.  The Haskell turn had way too many cars and it took forever to switch out the cars for Riceland, McClehaney's and the cars for the W&OV.

Now, after the Haskell turn works the line north to Haskell, it pulls into the siding, runs around it's train and works the Riceland plant, then heads back to El Dorado working any trailing point industries on the return trip.  The amount of work and time was reduced to a much more manageable task within the set hours of the ops session by not having to deliver cars to the W&OV.

The W&OV

This is where the fun begins.  Since The Rock no longer delivered to the The W&OV, they would become responsible to get the cars themselves.  This would required the W&OV to travel over Rock Island rails to El Dorado to deliver and exchange cars.  Not only did this give the W&OV crew another job to work, it also added to the traffic on the north end of the line.

Operations of the W&OV

A two man crew can be assigned to the W&OV during any operating session.  After receiving their Wheel Report and seeing what cars are bound for Malvern, their first task is to use the local switcher to gather the appropriate cars from the industries in Malvern to make room for the inbound cars.  Once these cars have been gathered up and the road power is tied onto the Razorback [The W&OV's daily train to El Dorado], they ask for permission to make the run to El Dorado.
Upon returning to Malvern, the power and caboose is cut off the Razorback, and is taken to the house.  The crew then grabs the local switcher and begins the task of delivering the newly arrived cars to their respective industries that is spelled out on the Wheel Report.   
Once this is done, their job is finished for the session.

Power for the W&OV

Having to retrieve their own cars also required a purchase of some road power and a caboose to go along with the Malvern switcher.

I had first planned to use a couple of ex-CR SD9's [one of which can be seen in the previous post] but after some careful consideration, the management, that being ME, began to look at some second hand ALCo power.  Eventually the 2 SD's will be traded for 3 four axle ALCo units;  2- C420's  and 1- RS11.  One of the newly announced Atlas S-2's will be the local switcher when they arrive.

Nothing better than solid ALCo power!

I hope this give some of you a better understanding and insight of Malvern and how it plays a roll on The Little Rock Line?


Sunday, February 24, 2013

Ballasting continues in Malvern


Nothing too exciting to report other than the ballast work is progessing.

Over 75% of the mains are covered as of today, along with 4 turnouts.  So far these turnouts have proved to be not much of a challenge as I remember.   I've used several drops of oil on the points to keep the water and glue mixture from leaving an insulating film.  I've only had to lightly scrape a few spots to allow for conductivity.

I'm also trying to be very careful this time and spread the ballast to just below all the ties with a soft brush.  There has been only a few specs of ballast that I've had to pop off the inside of the rails.

One thing that came back to mind was a tamping tool.  I used this where the track is laid on the cork instead of just the ceiling tile.  It's made from two pieces of balsa wood is 1.5" long and 3/4" wide with another small piece glued on handle.  One edge gets laid on the rail and the other lays on the ceiling tile and I just pad the ballast very lightly.  It gives the ballast a nice gentle even slope and shapes the ballast edges more evenly than your finger can.


I've got about 2' of mainline left to cover and then 6 more turnouts.  After this I can start staking out some foundations that will need to be poured for a couple of buildings and or concrete pads.  Once these are done I can finish applying ballast to the remainder of the sidings in Malvern.  


Friday, February 8, 2013

The Ballast Arrives.


I caught W&OV #6999 returning with the second load of  ballast this afternoon.


The Gritty Gravel Co. who is just outside of  Malvern and only a short jaunt down the track, is supplying the W&OV with their ballast. 


Wednesday, February 6, 2013

A Cloudy Day In Malvern


Feeling somewhat comfortable with painting the backdrop hills and crossing that hurdle, I wanted to add some clouds.

There are as many ways to make clouds as there are shapes of clouds; Painted with Oil and Acrylics, Air Brushed, using a Rattle Can with stencils, Sponges, etc, etc.  So I posted a question on one of my forums and Michael suggested using Pastel Chalks.
"White and light grey chalk are all you need. Start with white chalk and make a few half circles shaped like a "C"..... If you want to make storm clouds then add a little gray to the bottom and blend it in..... If you don't like your creation, wipe it off with an old tee shirt and try again."

Hmmmm.....sounded like this would be easy enough and not too hard to screw up.

I started with white chalk applied directly to the blue latex paint in a circular motion making small "C" shaped strokes, the gray chalk I applied to the bottom of the clouds for a shaded look.  Starting at the center of the cloud, I took my finger using a circular motion, smudged the chalk working outward.  This helped spread the chalk and makes the clouds dissipate.


Because the sky was painted with a satin finish, the chalk didn't want to adhere very well, but it also kept them from being overly stark white and vibrant similar to the distant hills.  Another problem is that the paint is not smooth; it's a little rough from being applied by a roller.  I tried on a sample board, spraying a matte finish on the sky before applying the chalk; this seemed to help the chalk stick a little bit better.  My only concern was wondering if the matte would yellow over time.


Saturday, January 26, 2013

Malvern - A 2nd attempt

  . 
OK this time I tried a couple of different things.  I started with a much lighter green but still had to add a bit white for the distant hills.  Then I added some yellow to bring back the green and finally added a touch of blue to fade it a bit.  For the closer hills I just added some darker green to the color I used for the distant hills.

I also wanted to give the closer hills a bit of depth, so I stippled the darkest green I had into the fresh paint of the closer hills.  Using a medium stiff fan brush, I pulled the darker green upwards, blending it into the fresh paint.  In a few places I accidentally pulled the paint onto the lighter distant hills!  This actually turned out to be  OK, as it got rid of the crisp line and made it look like a jagged tree line.     
With the Fiancée standing behind me, uttering a few words of encouragement, I felt that I was getting somewhere so I continued on.

I think by keeping the hills lower and using lighter colors panned out this time. Please forgive my photography, I need to get some better lighting equipment.

I went from this


To this


Someone commented that once a few buildings and some foreground scenery was in place, the hills wouldn't be so dominating.  I placed a few structures on the layout to give the eyes something else to look at and almost immediately the hills seemed to fade into the distance.

This is the paint and brushes that I'm using.


I'm still no Bob Ross, but I'm feeling happier...


Wednesday, January 23, 2013

Target - Malvern! ...continued


Steps 1 - 4 are complete.  Even after 16 years since the last time I've done any substantial scenery, it's coming back like riding a bike.

I inserted the sleeper ties and glued them in place with white glue being careful not to let it glob up around the ties, next came the paint.  Before painting, I wanted to protect the switch points so scraping wouldn't be needed.  I've read and seen where a strip of tape was placed across the points and frogs and then paint was applied latter by a brush to keep it off the points.  I wanted to try something different.

I took a small piece of napkin, rolled it between my fingers until it was big enough so I could pack it in between the point rail and the stock rail.  This should keep the paint off both surfaces.  This also held the opposite side tightly closed so that no paint could get on their surfaces.


I also took a small drop of oil and placed it in the joints of the switch points where they hinge on the Peco turnouts, my thought was this would keep the paint from insulating the switch points which has worked very well in the past.  Please forgive me, by the time I got the picture snapped the oil had puddled.  You only need a small drop.


Now I'm ready to paint.  I decided to use Floquil Rail Brown.  In the past I've used Floquil Roof Brown, but since this was more of a branch line and didn't get heavy traffic, I wanted a lighter brown.  Rail Brown has a tinge of green so I added a few drops of  Roof Brown to offset the greenish hue.  After the ballast is in place I plan to take a wash of some lighter brown and/or gray to maybe try and give the ties a sun faded gray look.

Here is Malvern with just the sleeper ties inserted  


After painting the ceiling tile with a brown latex for a base coat and to seal the ceiling tile and the tracks painted with Floquil Rail Brown


Since I used Atlas C80 and not C55, painting the track with a single color helps to hide the over sized rail.  I'm still deciding whether or not to use a Paint Pen to darken the rails a bit.  My concern is if I darken the rails with a darker brown or weathered black it will make them stand out and appear taller again, thus defeating the purpose.
For now I think I will just forgo painting the rails and just continue to ballast.  I can always come back with a Paint Pen if needed.

Getting tired of seeing nothing but blue skies on the layout, I got the itch to paint my background.  Having never done this before  I wasn't quite sure what it would turnout.  I have read through books, scanned through layouts on the internet and have used Google Earth to get some idea of what the terrain of  Malvern, AR looks like.  Much to my surprise, it's a lot flatter than I recall from a trip I took  through Tennessee, Arkansas and Missouri back in 1991.  I remembered more low rolling green hills than what I have seen on Google Earth.     
One layout that I came across that has a backdrop that I was looking for is the Housatonic RR in N Scale.  It's set in Southwestern New England.  It's a simple, yet effective backdrop that gives an illusion of distance using three basic colors with no major details.  To me, it does what a back drop is suppose to do;  It gives the scene depth, but does not draw your eyes to it.  In a few of the pictures where the owner has placed the buildings, you can just catch a glimpse of the rolling hills in the back ground.

So with a pencil in hand I started to sketch out the horizon.  First I drew the close hills and then when back and added a second horizon, above and behind the first.  I used some of the cheaper acrylic paints like Apple Barrel.  I started with a lighter green for the distant hills, then grabbed a darker green for the closer hills.

This is what I ended up with.


While it's not terrible, it's not quite what I had in mind either.  With this first attempt I did manage to get the feeling of depth and distance with the two colors.  I also was able to blend each color of paint a bit so as to vary the shades of those colors.  This helped to add a little depth within each color.  You can kind of see this on the dark green hill in the middle, the left side is a little lighter that the right side [Something I did pick up from Bob Ross]. I think a little yellow will help this even more.

A few things I need to correct;
First, the hills are a little too tall, they should be shorter to help convey distance better.
Second, I think they are too bumpy, they need to be flatter and smoother according to what I've seen on Google Earth.
Third, the colors are way to green and way to rich.  To my eyes, I have the feeling that these hills are not that far away.  I need to lighten the colors quite a bit and while I'm at it, the one thing I forgot to do is to mix some blue to the greens, this is suppose to add a "Fog" to the background colors and help them fade away in the distance.  
Another thing that didn't help was the dark green paint dried darker than I expected.

The next night I pulled out the can of blue paint and covered the "not so distant hills" so that I could start over.  I also went out and picked up a few more lighter colors of the acrylic paint, along with a bottle of  Yellow to vary the shades of the greens and a bottle of Blue to help fade greens.

Bob Ross I'm not, but this has given me a chance to get my feet wet and gave me a feeling and an idea of what I need to do the next time...

Practice, practice, practice


Saturday, January 12, 2013

Target - Malvern!


Well Since the Mayan's didn't bring around the end of the world, I thought I might give it a try.

Tonight, with most of my recent weathering projects and experiments finished and out of the way, after almost four years of construction, track work and wiring,  I commenced with the first steps of scenery!  Since Malvern, AR is kind of set off to one side of the layout and it doesn't take up much real estate, I thought it would be a good choice to get started with. 

Step 1.
After clearing out the cars and what building were setting around, I grabbed some old flex track and began by filling in the gaps between ties where the rail joints were made.  A simple project, but what a difference it makes.

Now let me see if I remember what comes next?  
Hmmmmm.....                                                                                          
Aaaah yes!


Step 2.
Fill in the joints between the ceiling tiles with lightweight spackling compound, then sand smooth.

Step 3.
Paint the ceiling tile with a latex brown to seal it up and give some good base color.

Step 4.
Grab the airbrush and spray paint the track with tie brown.  Acrylics of course!

Step 5.
Paint the backdrops.  This one will be new to me as I have never painted a back drop before I guess I'll see if I can find some old Bob Ross videos on YouTube and make some Happy Trees.

Stay tuned...


Tuesday, January 8, 2013

Second hand locomotives


As you can see, I haven't been doing too much to the layout lately.  After getting El Dorado yard rebuilt I've kind of taken a break from the layout so I could work on a few other needed projects.

One was getting a bunch of cars re-trucked.  A few months ago I made a swap with a friend who wanted to trade his Micro Train trucks and couplers for my Accumate trucks and couplers.  I think we traded in the neighborhood of  200+ pairs.  I'm still not quite done with that project as I have about 30 cars to go because I'm waiting on some wheel sets.

Also still working on a DCC problem.  Once I get a couple of locos speed matched they run fine.  When I shut the layout down and come back in a night or two those loco are still matched for speed, but they both run about 15-20% slower than I had them set for.  I'm running a bunch of different tests trying to get to the bottom of this.  I think I have it narrowed down to the Command Station or my programming skills with JMRI. If anyone knows how to cure this, I'm all ears.

The other was to get more Rock Island power chipped so I could return several leased chipped locomotives that Quin had loaned me to fill in so we had enough power to commence operating sessions.

So, continuing with my allure of  Rock Island oddballs, I recently scored a couple of locomotives pretty reasonable from the Bay that I've always wanted to add to my roster.  A pair Kato E8A/B in UP colors, even though they are a little older than the time frame I'm modeling.  After getting the resurrected "F" units finished and the Ex- Rio Grande GP7 completed, I started in on the E's.

This was my inspiration;


On the GP7  I used a light gray oil paint for the fade since black will normally fade to gray.  On the E's I wanted them to look very faded from years of use, so I started out with a white oil paint.

These units both started out as factory painted UP units.  I removed the lettering and logos, applied new decals and gave them a flat coat of Model Masters Flat.  Then I used a slightly thinned white oil paint and applied it with a brush, working it into all the nooks and crannies.  Using a "Q" tip and a small brush I removed what paint I could.  The oil paint has a tendency to stain the flat coat leaving a white-ish film.  After letting them dry for a day or so, I sealed it with a another flat coat.


The next step was to apply the colored washes; I used Burnt Sienna on the B unit and Davy's Gray mixed with a little bit of white and touch of Burnt Sienna for the A unit.  The A looks more faded with the gray wash while the yellow on the B unit look a little richer.

The "A" unit is on the right


The "A" unit is on the top


After the paint has dried, I attacked them with weathering powders and some black wash on the grilles, then sealed them up with a final coat of flat.


The snow shields were fabricated from sheet brass.  JnJ Trains has UP Snow Shields listed on their web page in a etched, folding brass kit but I have never been able to make contact with them.   So I did the next best thing, I made my own.

I think these are gonna look great pulling a string of  TOFC's!

Now I need to get back to the layout...