Saturday, July 2, 2022

Brighter headlights

One thing that I have never been impressed about N scale locos are the headlights.  Some are so dim you can hardly tell they're on, others are OK while some will actually cast a shadow.  This became somewhat more problematic when the DCC chips started arriving with surface mount LED's.  It's not that they were dimmer, but they set back further from the glazing than the larger 1/8" LEDs of old.

Recently after finishing up the Whitewater Creek scene, I ordered some 603 and 804 pre-wired LEDs from eBay.  My goal was to mount them right behind the headlight glazing to hopefully increase the brightness of the headlights.

On the first try I used some small heat shrink tubing to keep the wired in check and then taped the LED to the roof of the shell.  This worked pretty good but on one of the locos there wasn't very much room between the chassis and shell.  The second one I used a short piece of heat shrink tubing right behind the LED and taped that to the inside roof and then taped the majority of the wires to the top of the chassis and DCC board.  This allowed the shell to fit down completely.

To connect the LEDs, I removed the front surface mount LED from the board and attached the wired LED to the same pads.  This allowed me to simply attach the wires without using an additional resistor.


My first try was on an Atlas GP40.  The one on the right is a stock unit with a Digitrax DN163A0 with a surface mount LED on the chip.  The one on the left has the 804 wired LED taped to the inside of the roof and the LED was bent at a 90° angle so it sat right up against the glazing.  There's a little bit of light bleed and glare, which needs to be addressed with some black paint, but a definite improvement.


Excited with the results, I dug out a couple of my GP18's.  These are Life Like shells that I was able to stuff an Atlas GP chassis under (as I wasn't fond of the LifeLike chassis).  Again, I added a short length of heat shrink tubing right behind the LED so I could tape it in place easier.

I must say I'm very happy with the results.  Do note that both GP18's have the same type of LED installed, both are warm white, but the one on the right seems a bit whiter which is due to the glazing.  The left GP18 has glazing that is a bit yellower than the one on the right.  The headlights are actually brighter in person, but you can see the difference.


I'm only replacing the front headlight since most of the time I'm running the locos with the short hood facing front and rear in the consist.  The shot below shows what a typical stock headlight looks like on the right with the board mounted LED on the rear of the loco.


On another subject, I started speed matching 2-4 locos in a consist using the Advanced Consisting option.  This also allows me to remap the lighting functions so that only the headlights on the front and trailing unit turn on, while the rear headlights and both headlights of any middle units(s) stay off.  Thanks to Matt S. for showing me how that's done. 

At least now I won't have to look a second time to see if the lights are on or not!


Wednesday, June 29, 2022

Visitors in June

Two more good friends of mine decided to stop by for a visit.

Paul S. had a business meeting in KC and drove three hours for a meet & greet and to run some trains.  When Matt S. found out Paul was stopping by he decided to come over as well.

Matt lives near me but Paul lives in Washington state.

It was pleasure to finally meet Paul in person.


Paul also met my main support beam... 


Great to finally meet you face to face Paul and I'm glad that Matt stopped by as well.


Monday, May 30, 2022

Skeeters!

"When I heard what the power was going to be on the Winnfield local today, I decided to make the hike through the area to get back to the bridge. I thought the Skeeters were going to carry me away before I got the shot!  It wasn't the easiest, but it was worth the effort." 


Saturday, May 7, 2022

Loblolly Pines 2

After getting the Crayons melted and applied to the twisted wire trunks, the next step was to spray paint the Sisal.  For this I chose to use Krylon Camo Brown which I had on hand. 

These ten trees have been painted and ready for foliage.


I chose Woodland Scenics coarse foam in Medium Green for the foliage. To apply the foliage I used this spray adhesive by Loctite (again because I had it on hand) and sprayed the Sisal with a good coat but not real heavy. 


I dumped a large batch of the foam into a plastic tub and stirred it up so it was not packed down.  I first dipped the top of the trees into the foam and then laid them on their sides and rolled the trees in the foam.  This only allowed the foam to stick on the tops and outer edges and left the inner branches bare.  This gave them that open and airy look.

This was followed by a generous coat of hairspray to lock it all in place.


The next step was to respray the trees with another generous coat of hairspray and apply a light coat of Woodland Scenics Medium Green Flocking with my static grass applicator to give the appearance of having some needles (yeah I know, it's a little hard to see them).


While these are by no means a perfect match for Loblolly Pines, I think they'll fit the bill, especially once their planted alongside the Supertrees?

Now I can start planting trees...


Loblolly Pines

According to Wikipieda:

Pinus taeda, commonly known as loblolly pine, is one of several pines native to the Southeastern United States, from East Texas to Florida, and north to southern New Jersey.[2] The wood industry classifies the species as a southern yellow pine.[3] U.S. Forest Service surveys found that loblolly pine is the second-most common species of tree in the United States, after red maple.[4] For its timber, the pine species is regarded as the most commercially important tree in the Southeastern U.S.[5][6][7] The common name loblolly is given because the pine species is found mostly in lowlands and swampy areas.[8]

With my layout based in Arkansas and Louisiana, there are a lot of deciduous trees, but pine trees also make an appearance. So it seems only natural to include these on the layout.

There have been 100's of ways to build model pine trees described over the years, but I never really looked into it until now.

While surfing Google on "How To's" I found a video on YouTube where a modeler used the Bottle Brush technique to make birch trees for his layout.  It's not a special technique, but what stood out to me was the fact that his trees did not wind up with a "pointy top" that associated with most pine trees and the way he created his trunks. 

The Loblolly Pines have more of Rounder top and I thought his method would get me the results I wanted?

Here are a few images of the Loblolly Pine


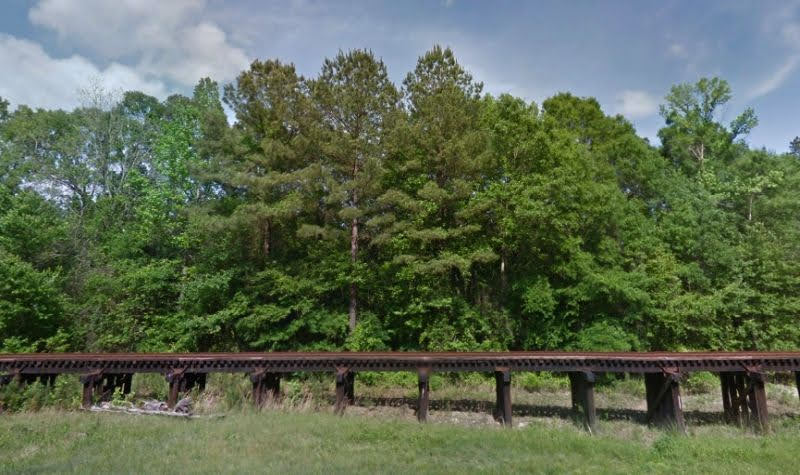
This photo came from Google Maps while I was searching for the bridge over Whitewater Creek.  As you can see there are three Loblolly Pines right in the center, behind the bridge.


I started making the trees with the typical materials: Wire for the trunk and Sisal for the branches.  After getting them made this is what I wound up with.


The modeler used 18ga copper wire, which is probably the better choice but with the cost of Copper at the time of this writing I chose to use Floral wire that I found on Amazon.  Most Floral wire is coated in a green material but I stumbled across some that were coated in Brown.

I was little worried about not using the softer copper wire but decided to give it whirl with the cost difference.  (In the end, it worked just fine.)

The next step he did was to make the trunks thicker which would hide the twisted wire.  He did this by melting Crayons and applying it to the wire with a spoon.  So again I turned to Amazon to find some cheaper supplies.  I found a small one piece double boiler that would fit a small, older pan that I had on hand (and that the wife wasn't using).

I also started looking for Brown Crayon in bulk. Wasn't sure what I would find here but I did a search and to my amazement, I found Brown Crayons in bulk.  

Here's a list of what I ordered from Amazon


I wasn't real happy with the color of the brown crayons and thought it looked a little too brown, so I looked for some gray crayons to change the color to a brownish gray.  I found some gray crayons in bulk as well but wound up finding some on eBay much cheaper.  I found a 3lb bag of gray crayons for the cost of 12 from Amazon!  Way more than I needed, but figured what I didn't use, we could use to color one of our walls if we got bored.

So with all the supplies in hand I got started to see what I could come up with and how much of a mess I could make.


To my surprise, this worked pretty dang good and only wound up with a slight mess.  Here is one of the trees after covering it with the crayon sauce. I shot this image after I had painted the Sisal branches with Krylon Camo Brown.  


One last note, the brown material that coated the floral wire started peeling once I started twisting the trunks.  Wasn't sure I liked this but after removing the worst of the coating and covered the trunks with the crayons, what was left of the coating actually added to the look of the looks.  It gave them a more natural look that wasn't perfectly shaped which can be seen in the previous image.

All in all I think they came out just fine.  I'll post images of the finished trees in the next post.


Friday, May 6, 2022

Flocked Supertrees

With the blog updated about the Reeds, I can now post updates on my Supertrees.

I think I've made close 60 large trees and close to 80 small saplings made from the trimmings.  I just can't see tossing all those trimming.

These trees have been painted and ready for flocking.


These are about 2/3rds of the large trees that are finished.


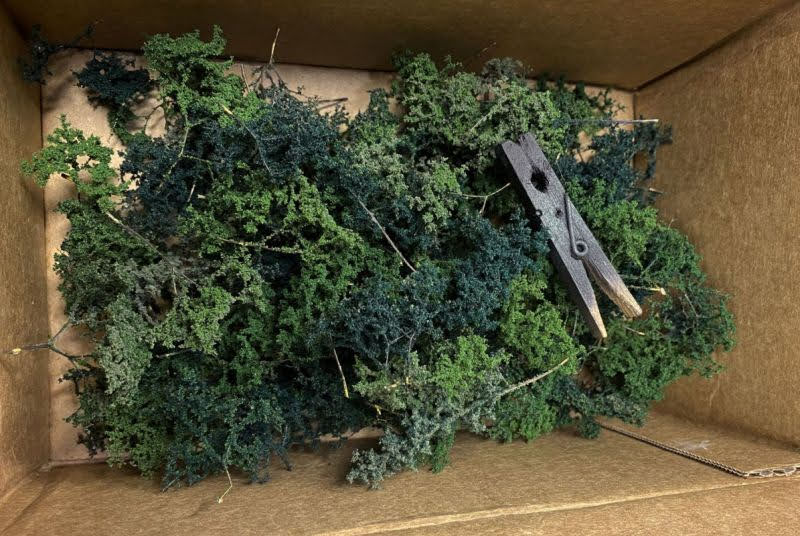
This box holds all of the sapling.


At the time of this posting I have all the Supertrees flocked and ready for planting, but before I start planting these, I'm also working on a dozen Loblolly Pines which are just about ready.  I'll post them next.


Thursday, May 5, 2022

Reeds

I started on these reeds about a month ago and got sidetracked making trees, so I'll post about them now before I forget again.

What's a body of slow moving water without some reeds?

I started out using some Woodland Scenics Light Green Field Grass.


I grabbed a small batch and pinched it with a pair of tweezers to flatten them out. With a scissors I evened off the bottom.


Then I dipped that end in some Matte Medium and let it dry.


I trimmed the tops off to a length of about 1/2" even, later I cut a few at a slight angle so I would wind up with a few different lengths.

Using an exacto I split them into smaller batches.


I placed them on the creek using Alene's tacky glue, once dry I dry brushed some of the tips with glue and sprinkled on some fine brown foam from Woodland Scenics Plant Hues set for the cat tails.


After getting a batch made up and getting them glued into place along the edge of the creek, I decided to make another thin pour of the Realistic Water so it looked like they were IN the water.