One thing that I have never been impressed about N scale locos are the headlights. Some are so dim you can hardly tell they're on, others are OK while some will actually cast a shadow. This became somewhat more problematic when the DCC chips started arriving with surface mount LED's. It's not that they were dimmer, but they set back further from the glazing than the larger 1/8" LEDs of old.
Recently after finishing up the Whitewater Creek scene, I ordered some 603 and 804 pre-wired LEDs from eBay. My goal was to mount them right behind the headlight glazing to hopefully increase the brightness of the headlights.
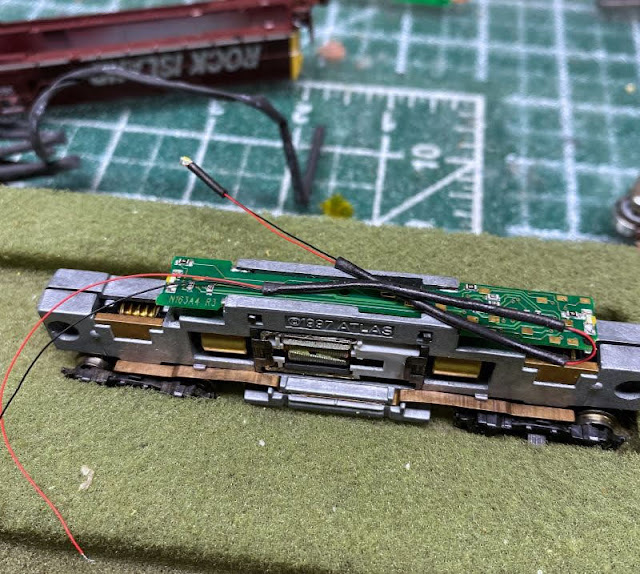
On the first try I used some small heat shrink tubing to keep the wired in check and then taped the LED to the roof of the shell. This worked pretty good but on one of the locos there wasn't very much room between the chassis and shell. The second one I used a short piece of heat shrink tubing right behind the LED and taped that to the inside roof and then taped the majority of the wires to the top of the chassis and DCC board. This allowed the shell to fit down completely.
To connect the LEDs, I removed the front surface mount LED from the board and attached the wired LED to the same pads. This allowed me to simply attach the wires without using an additional resistor.
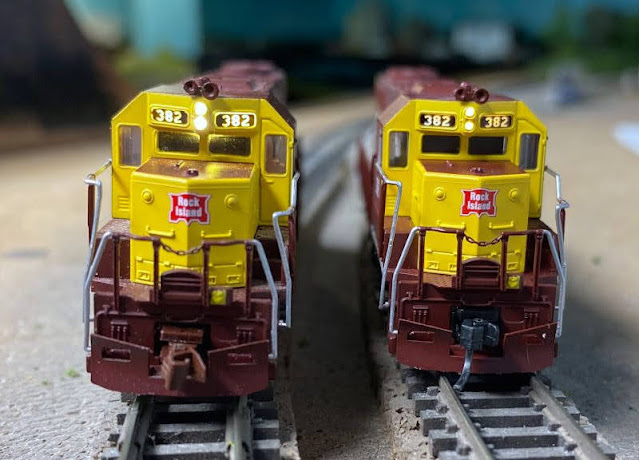
My first try was on an Atlas GP40. The one on the right is a stock unit with a Digitrax DN163A0 with a surface mount LED on the chip. The one on the left has the 804 wired LED taped to the inside of the roof and the LED was bent at a 90° angle so it sat right up against the glazing. There's a little bit of light bleed and glare, which needs to be addressed with some black paint, but a definite improvement.
Excited with the results, I dug out a couple of my GP18's. These are Life Like shells that I was able to stuff an Atlas GP chassis under (as I wasn't fond of the LifeLike chassis). Again, I added a short length of heat shrink tubing right behind the LED so I could tape it in place easier.
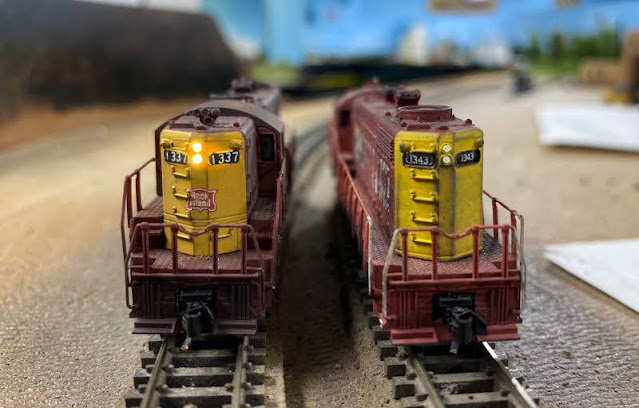
I must say I'm very happy with the results. Do note that both GP18's have the same type of LED installed, both are warm white, but the one on the right seems a bit whiter which is due to the glazing. The left GP18 has glazing that is a bit yellower than the one on the right. The headlights are actually brighter in person, but you can see the difference.
I'm only replacing the front headlight since most of the time I'm running the locos with the short hood facing front and rear in the consist. The shot below shows what a typical stock headlight looks like on the right with the board mounted LED on the rear of the loco.
On another subject, I started speed matching 2-4 locos in a consist using the Advanced Consisting option. This also allows me to remap the lighting functions so that only the headlights on the front and trailing unit turn on, while the rear headlights and both headlights of any middle units(s) stay off. Thanks to Matt S. for showing me how that's done.
At least now I won't have to look a second time to see if the lights are on or not!


No comments:
Post a Comment