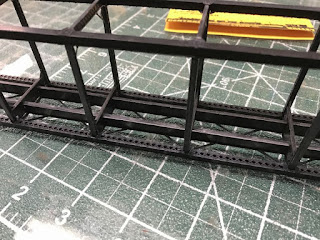
Tonight I got started on the Central Valley Pratt Truss bridge.
I gotta say the kit seems to be a nice kit, the parts are fitting together very well albeit they're a bit on the delicate side, and kind of soft. So far the worst part of the kit is the instructions, they leave a bit to desired, and the pics are a little lacking.
So far I think I've spent 2-3 hours on it and have it maybe half built?
The next assembly on order will be to get the end portals attached, then the laced "X" bracings assembled and installed along the top.
I know one thing, if it wasn't for my PBL sprue nips, my Touch "N" Flow glue applicator and my bottle of MEK, I'd be pulling my hair about now!
With the bad weather that's closing in this weekend, it'll be a good time to stay indoors and work on this project.


Hi Allen,
ReplyDeleteI've built 3 of those and they have come out really well. They may seem flimsy when starting out but as the structure goes together it get surprising strong.
All of mine were shortened to 3 sections to match prototypes. Agree that a proper sprue cutter and liquid plastic cement are a must for this project. Enjoy !
Hey Brad.
DeleteGlad to hear the good words about them. You're right, at the stage it is now, it's become very sturdy. I'm a little worried about how the portals will fit in place, the instructions seem a little vague. But I'll plug onward.
Looking really good Allen. Yep liquid glue (Testers Plastic Cement)is all I ever use on any plastic kit. Have done for as long as I can remember. If you hold two pieces together then just wick the glue on, it melts the plastic and almost welds the two together.
ReplyDeleteRod.
Thanks Rod.
DeleteI wish I would have learned about this years ago when I was building models. They would have looked a heck of a lot better, lol!