Sunday, March 29, 2015

Grade crossings and weed covered sidings, Oh my!


With March about over and April just around the corner, things are really starting to green up around here! Makes me wonder if the W&OV will have enough in their savings to spray for weeds this year or not.
I'm sure it's really high on their priority list, lol. 


*******

I'm continuing to plod right along with scenery.  Friday night I was able to get the two wooden road crossing installed on the west end of Crushmoore.  One is on the main and other is on the siding where the pulpwood cars set.

This is the first time I've ever installed any wooden crossings.  One thing I wanted to make sure was that I would not be rubbing them every time I cleaned the track so I sanded the thickness a bit so they'd sit well below the rail head.  To my surprise their thickness put them about even with the rail head, and I'm using code 80 rail.  But not to fear, a few passes on a sanding board took care of them right quick.


Once I got them installed I wanted to weathered them a bit.  I started off using an India Ink wash, this gave the gray, faded look.  Then I grabbed some pastel chalks and while the planks were still wet, I rubbed my finger on the brown chalk and then on the crossing, followed by some black chalk on the middle sections. 


The next thing to do with these will be to lay down some of the grout and make the actual road leading into the West end of Crushmoore..

The next step was to get the base coat of ground foam down. I painted on the glue mixture then sifted the foam over everything including the tracks.  This reminded me that I wanted them to look weedy and overgrown with little maintenance.


So after things dried and I sucked up the excess foam, I started playing around with the sidings.  This is the first attempt I made with ground foam using the chip loading siding at Crushmoore as the Guinea pig.


While it doesn't look bad, I didn't like the ballast that was showing through being the same color as the ballast next to it.  Then I tried something I've always wanted to do when I got to this stage.  I grabbed some cheap acrylic dark brown paint, thinned with windshield wiper fluid and added some dark gray and a touch of black so that it looked like liquid mud. Thinned it a bit more, which was still heavier than a typical wash, and painted it right on the track and ballast!  After it had dried a bit I went back with the ground foam and lightly sprinkled several different colors of ground foam starting with an earth color, then a dark green and worked my way toward the lighter colors.  I then finished it off with some coarse ground foam.

Liking the looks of it much better, I grabbed the glue mixture and saturated the entire siding and let it dry.  Then I went about giving the other sidings the same treatment.


This is the siding for the pulpwood unloading at Crushmoore.


This is the siding for Heavy Metal


I really liked the way the wash toned down the ballast on the sidings and along with the earth colored foam made it look like the tracks had settled into the mud.   Once I get the rest of the sidings done with this treatment, I think it'll be time for the static grass.

The first attempts with the grass was a little disappointing to say the least.  I used a mix of Woodland Scenics Light and Medium Green.  It came out looking like the grass was frosted and little to light.  After discussing this with a few friends, I think the main problem was it was too short and too light.  I'm looking at some Noch grass that I and another friend have on order which is a mix of 2, 4 and 6mm lengths.  It's a blend called Medium Green Cattle Pasture and another one is called Summer Field Static Grass.

If this doesn't do the trick I might try some Silfor 4mm summer grass and 6mm late summer grass.


Saturday, March 21, 2015

Spring comes to Malvern.


Since today is the furst full day of spring, I thought it would be fitting for this post today.
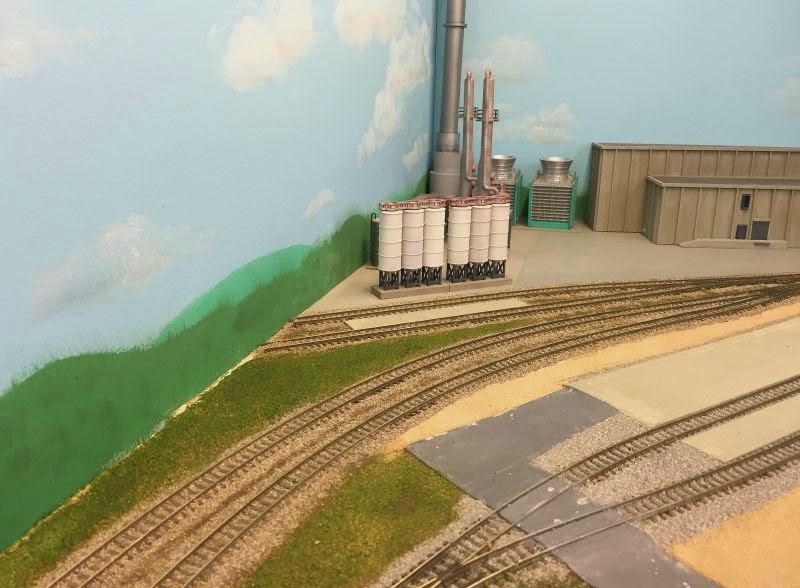
I've been working pretty steady over the last week trying to get the base coat of green down in Malvern.  My goal is to break out the static grass and try to get some of that applied before I clean things up and take a break.  I plan to start remodeling my kitchen shortly, but we'll see...

After getting the roads and pads poured, I wanted to get some grass and parking lots laid out so I could finally get a chance to break out the static grass.  I know, I know. I've said this so many time before, but I think I'm finally ready.

After getting some of the grout laid out, first next to the shoulders of the road to help hide the fill ballast, I also got it spread around the W&OV engine facility.  Finding out how bad the grout can stain or change color of anything it touches, I laid down some some tape to keep off areas like the ballast and facility pad.

This worked good but it also gave me a very prominent line that looked a little unnatural.  I later went back and sprinkled the grout on with my fingers to mask the line.  Once this was done, I spritzed the whole grout parking lot with water until it was very damp.

In some some places the grout did not want to set up, maybe because I didn't mix it. So what I did was to go back and with alcohol and sprayed down the whole area so it was damp and then coated the whole area with my ballast glue.  This did two things, one it glued it down just like ballast and it also darkened it a bit.  Which turned out to be a good thing as the Polyblend Fawn #156 was a little lighter than I was hoping for.  Now it looks a lot closer to sand or gravel.

I'd post a picture of the Fawn color but it's no where near the color that it turned out to be once applied, it's a lot more red than I hoped for, but nothing that an acrylic wash wouldn't take care of, I hope.

But here's a link to the Polyblend colors [however long it lasts]                              POLYBLEND COLOR CHOICES

Once the grout was down and dried around the W&OV facility, Heavy Metal and on the west end of Crushmoore, I started laying down the first base of green ground foam!


The next thing I want to do is finish blending the edges a bit more and then add a few other colors for a bit of variation.  Once I get this done, I'm gonna start playing with the static grass!!

I've done some scenery before on a few of my Bend Track modules years ago.  But this is the furthest I've made it on this layout.  Things are finally coming together, it's only been 7 years since I first put up the benchwork here in Malvern.

It's come a long way since this...


Wednesday, March 18, 2015

Gravel roads and parking lots


Since the last time I've done any major scenery work, I've read about so many new techniques and methods that I've wanted to try, now I'm finally getting a chance to try some. Talk about learning to ride the bike all over again...

One of which is the use of sanded grout for gravel roads and parking lots.  It comes in a wide variety of colors and is very fine, much finer than any material I've used before. It's also dirt cheap [pun intended].   One thing I learned already, was the grout powder will discolor any area it touches and it's hard to remove so I've roughly taped off the ballast, track and roads to prevent any discoloration before I sift it into place.
The way I'm using it is to paint the surface an earth color first.  After it's dry, I spread thinned glue down [about 70% white glue to 30% water].


Then I use a sieve to spread it over the glued areas.


Once I get it sifted into place I let it dry.  Then I wet it down again with a small atomizer of 70% alcohol then apply a 50-50 white glue mix like you would use to glue ballast in place.


Once it's dried, it isn't going anywhere.  It's probably hard to see too well, but there is a good amount of texture with the sanded grout.  


One thing about using the tape, it can and will leave a very defined line so I will probably have to go back over this with a bit more ballast or try and work a line of weeds between the ballast and the parking lot. This might be a good use of static grass?  As you can see, some paint was removed when the tape came up.

Next step is to add some green ground foam...


Sunday, March 8, 2015

Things to do on a nice warm day...


Having no further use of these and not being able to find anyone who wanted them, we decided dispose of them.  Just throwing them in the trash didn't sound like much fun, smashing them didn't sound exciting enough,  neither did some of the other ways we discussed.  But..... giving them a dry Viking funeral did seem interesting.

So when the first warm day came around......


Rest In Peace


Thursday, March 5, 2015

Caution! Sharp Drop Off


After getting the roads poured in Malvern, the one that  lead back to Olin-Chlor was a little thick since I wanted it to be at the same level as the track when it crossed it.  This left a huge drop off  that I was going to have to fill, but how?


My first thought was to use plaster, but the sanding dust, ugh!  I also thought about using ground goop but have never used this stuff before.  Hmmm?

So I grabbed a bag that I had picked up at the recent train show and got after it.  Right from the get go I could see this was going to about as messy as plaster.  I didn't like the results so I quickly scraped it up and cleaned the area the best I could.  I got some smeared on the road [of course I was in too much of a hurry to tape things off] so when I'm done I'll just repaint it.

Later I thought why not just fill it with some sanded grout? It's cheap and I've always wanted to give grout a try since reading about it on the forums and seeing the results. But not having any on hand at this time of night I decided to grab some old ballast and see how that works.

I found a Cool Whip container with some old Woodland Scenics Fine Buff.  I used a spoon and sprinkled it up next to the road and then feathered it out away from the road's edges using a small block of wood like I've done before to tamp my ballast.

Once the ballast was in place and feathered out I sprayed it down with 70% Alcohol and applied the glue mixture just like I would when gluing ballast.


This was a lot easier with a lot less mess than plaster.  Now after it dries I should be able to clean it up and apply whatever type of ground cover I want right up to the road.  

I'll pull up the concrete and finish painting the edge of it and then I'll glue down the front edge so it sits down on the surface without the gap.  But I'll cross that bridge later when I repaint the road.

This was kind of a stumbling block for me as it's been a fair amount of time since I've done any kind of scenery work.  I guess I was overthinking it...D'oh!


Tuesday, March 3, 2015

Olin-Chlor expansion, part 8


I stopped in Malvern last night to see how things were moving along with the Olin-Chlor plant.  Looks like the building and the new pad was finished and also looks like the new storage tanks are going up.

*******


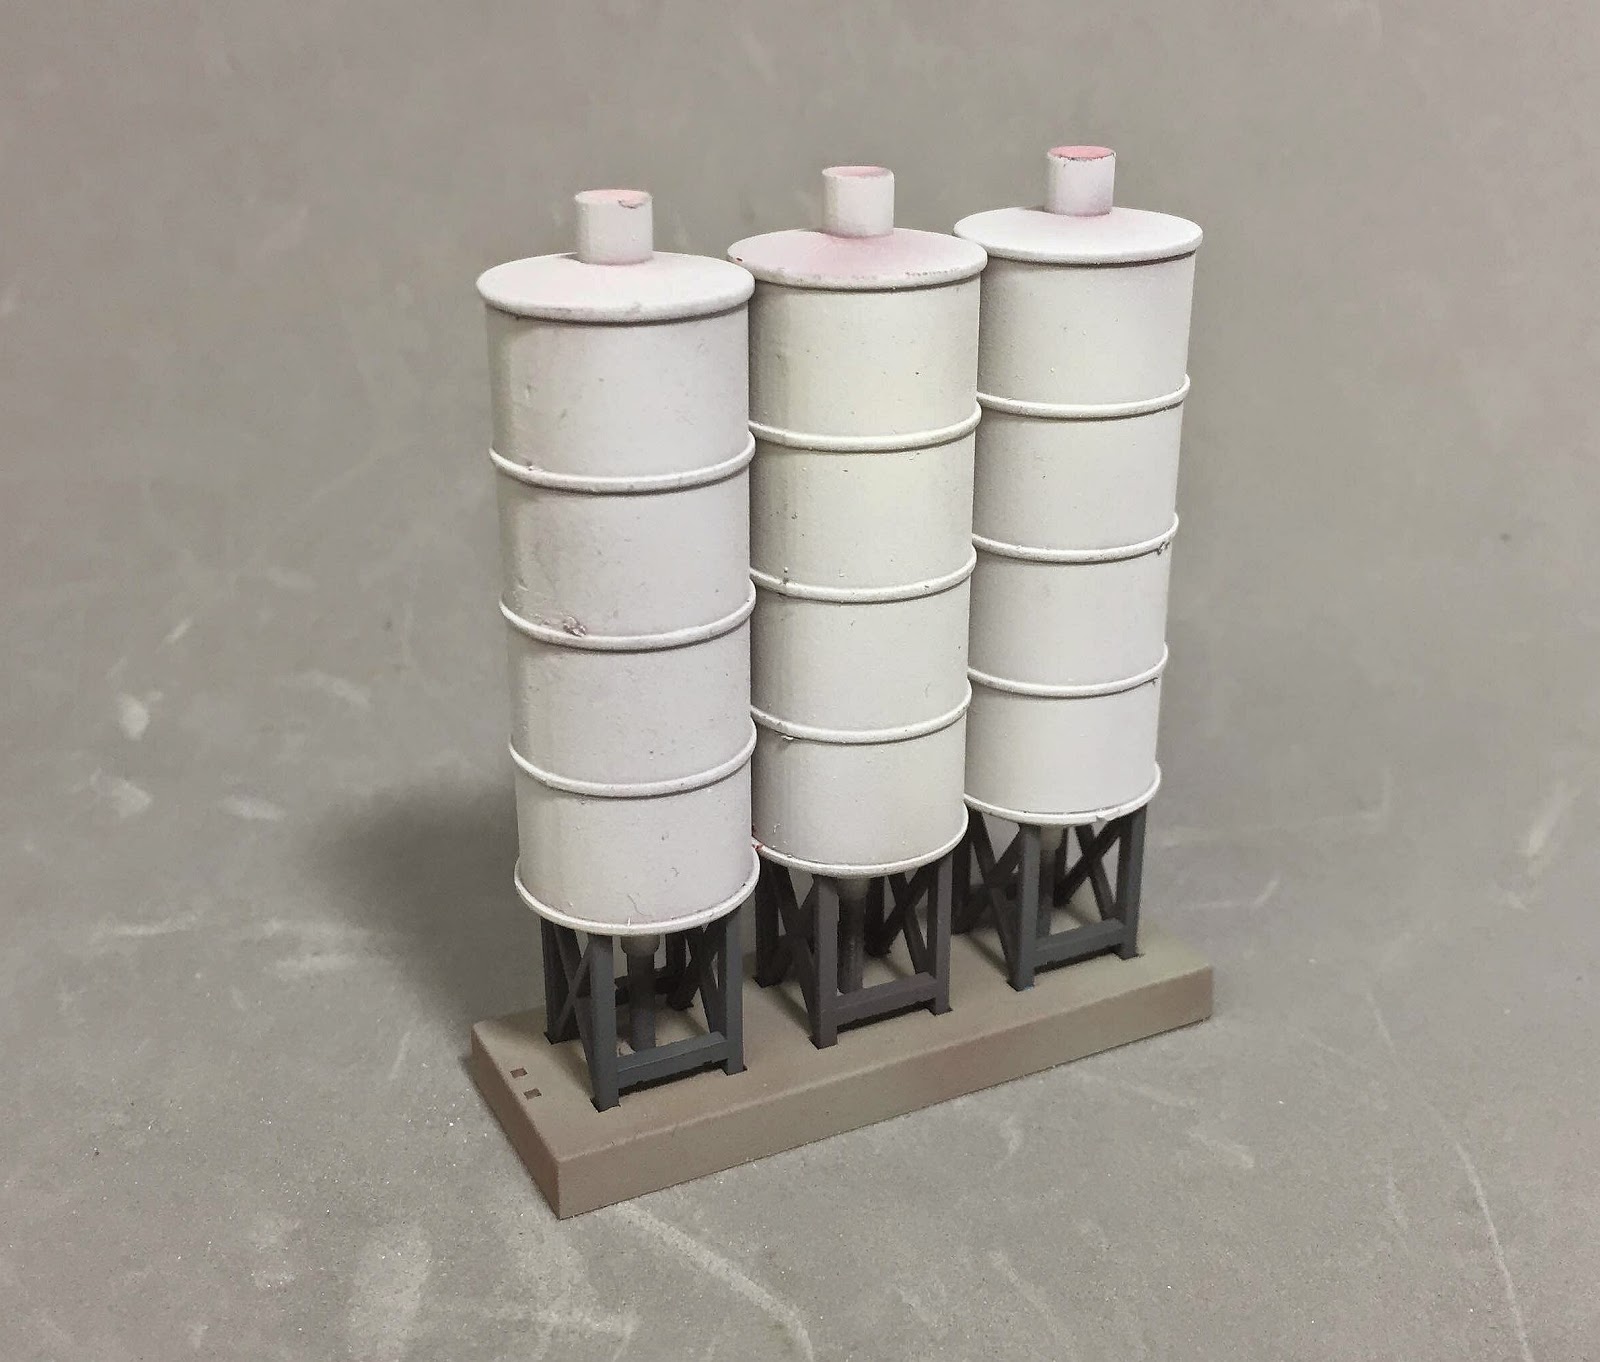
I finally received my Tomytec upright storage tanks.  Wasn't real happy with their choice of color, but what are you going to do?


The other night after a little debate and a few texts to Steven and Greg, it was decided that they should be painted white. But first I wanted to give them the same treatment as I did for the piping cage and distillation towers.


After gluing the bottom funnels to the tanks I cleaned up the mold lines up and then shot everything with oxide red for a base coat.

Next I misted the white over the oxide red just enough to allow the oxide red to show through. This would give the appearance that the white is fading and rust is setting in.  I even painted the concrete slabs with the oxide.  My hopes are that I can replicate rust that has run down the stands and have stained the concrete slab.
After getting the white sprayed on, it wasn't as opaque as the silver and the oxide red came through enough that the white looked kind of a mauve color, so I sprayed the white a bit heavier.


So far things were going good until I got the walkways.  These I sanded down the thickness a bit, but no use.  These things were just TOO DAMN THICK.!!  After snapping a couple of pics and sending them off to Steven and Greg for approval or rejection, may answer came back  REJECTED! 
I have to say I agree with them. It's too bad too, these are really pretty nice looking kits if it wasn't for the catwalks and railings. 


I did think ahead and ordered some Gold Metal Model industrial walkways just in case, and it looks like I'm going to need them too so, back to the drawing board...

I think I'm going to see about adding a ladder with a safety cage so I can replace the ladders which are almost as think as the railings.  

Another thing that is missing is there is no piping for filling these tanks.  But I think I have plan for that.


Wednesday, February 18, 2015

Roadwork in Malvern, part 2


Last night I got a coat of paint on the new roads and was able to get the buildings set back in place.

I don't think they turned out too bad?  However, I think I prefer the use of styrene for roads, but the jury is still out on this.  With plaster you can do just about anything but there are drawbacks.  

The main one is it's messy as hell, both in mixing and in sanding them.  Almost as bad as sanding drywall mud.  I had my vacuum handy and was always using it to keep the dust down.  Even then it got everywhere and it actually changed the color of the ballast in places.  One thing I learned, I need to pour the roads before ballasting.  At least I think it would be better and I wouldn't have had to be so careful with the plaster.  Oops.

Using the Woodland Scenics Foam Tape to make forms for the plaster was pretty slick.  I did have a few issues where it stuck too good the surface and I had to go back and pick it off with a knife.  It did do a pretty decent job of keeping a nice clean edge to the plaster.

It was also kind of hard to keep the surface level with some of the large odd shapes I dealt with in Malvern, which meant a lot of sanding.

Regardless of styrene or plaster, you have to keep it down below the rail head otherwise you will be constantly repainting the area every time you clean track.  As I was testing the crossings with a loco, I went back with a #17 X-acto blade and scraped the plaster down below the rail heads and repainted.

None of these are a real bridge burner though, but at least with styrene there is no sanding dust to deal with. However trying to cut and fit styrene can be a bit of a trick, and of course the cost is probably a bit higher.

Anyway enough analyzing, here are the results of my efforts. 

Crushmoore's asphalt parking lot.


Heavy Metal's storage pad and the street.


W&OV's asphalt driveway


The road to Olin-Chlor


A couple of "over all" shots of the area.


I still need to go back and scribe some lines in the roads and Heavy Metal's pad for concrete relief grooves, add some pot holes and patches, striping and then weather things a bit. But all in due time, at least it feels good to make some visually interesting progress.

I think once I get some ground goop spread around and the first layer of foam down, things will start to pop.


Sunday, February 15, 2015

Roadwork in Malvern, and a milestone!


In conjunction with laying the pad at Olin-Chlor I needed a road leading into the facility.  I had originally planned to bring one in from the right side of the plant which would cross the tracks between the turnouts at Frump Gas and Olin-Chlor. I wasn't sure if I was going to be able to fit a road in there with the size of the building without having to squeeze it in, but after cutting the building down a couple of times it looks like now it'll be possible.

Like the pad at Olin-Chlor, I thought about getting another sign and making the pad around Heavy Metal, but Quin reminded me about the Woodland Scenics Road System which uses foam tape as concrete forms.  After I did a little research on how to do this, he gave me a roll of tape and small container of Smooth-it that he had on hand.  This turned out to be pretty simple and I got after it the first night. 

The first pad I laid out was the street and pad for Heavy metal and the drive leading into the W&OV facility.


Then I laid out the parking lot for Crushmoore's office.


These were pretty straight forward and could see how well they were going to work.  But the road I had planned leading into the Olin-Chlor was going to be a little tricky.  One thing I do not like to see is how some will lay the road flat upon the bench top up to the tracks and then angle it up sharply so it crosses the tracks.  I wanted it a bit more even and level with the tracks.  So what I did was to lay down some cork as a filler and then lay the form tape on top of the cork.  This will bring the surface of the road up much closer to the level of the tracks without that sharp rise.

I glued sections of the cork in place so I could then feather them down gently to the ceiling tile with a sanding block made up with 80 grit paper, then I applied the tape to the cork.  Then when the plaster is dry, I can peel the tape off and remove most of the cork.  On the back side of the crossing, I used a piece of foamcore to build up the mold which will also be removed after the road is in place and dried.  


OMG!!!  Sunday, February 15th, 2015  Mark this on the calendar!

After almost 9 years of construction, I have made the first attempt at scenery on the Little Rock Line!!!  It's not much to write home about, but it's a start!


Now I have built buildings and I have spread ballast, but this I consider the first application of real scenery! So it has begun.....