
Been meaning to post this for a while now.
The Atlas B23/30-7's have a different type of light glazing over some of their other locomotives which presented a problem that I needed to overcome in order to get the bright lights like I did on the GP18's earlier in this blog.
Here is a closeup of the two front cab glazings. The one on the left is from the B23/30-7's, the one on the right is from a GP40, this one has a "U" shaped area (where the red arrow is pointing to) molded into which is where the early 3mm LED would roughly fit in place when the model is assembled and for the most part, this design works pretty good.
However on the other one you can clearly see the light tube that lowers it so that it sits in front the newer surface mount LEDs that are now being used on the newer drop in DCC boards. The trouble is that for whatever reason this tube does not carry the light very well? Maybe because it's bent?

So I wound up using some .030" clear fiber optics that I found on eBay after a friend told me about them. I think they cost me around $12 with shipping? They are just a bit smaller diameter than the light tube openings, but when I flared the outer end, they'll seat snuggly in place. I now have enough to light my entire fleet up and then some.


I first flare the ends carefully, it doesn't take much heat at all! Just few quick swipes of a lighter flame is all that's needed. Then I cut these to 3/8" long. It's hard to see the flared end.

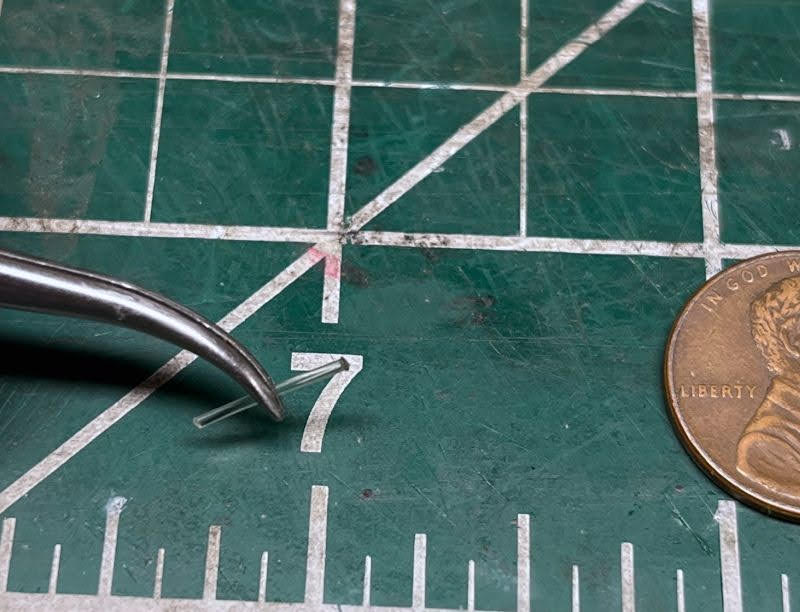
Once flared, I stick them in the light holes. One small thing, the 804 LEDs are not quite big enough to cover both fiber optics because of the little bit of space that separates the two light holes, so I that's why I cut them at 3/8" long and when inserted, I can sit the fiber optics right on top of each other with no space. I still have to be careful when positioning the LED to the ends of the two fibers as its still close.
So to hold these in position someone suggested that I try Bondic Glue. Bondic Glue is a glue that is cured using UV light within about 5 seconds. It was advertised to glue ANYTHING! Well to a point it will, it's not a wonder glue but it does hold the fibers and LEDs in place good enough for this application.
Next I spot glue the LED to the fibers and check the positioning, if I get the LED is off center just a bit, one light will be a bit dimmer than the other. If needed I can take a knife and pop the LED off and pop the excess glue off the fibers and try again.
.


With the fibers secured, I'll spot glue the LED to the ends of the fibers and apply power to see how well I they're both lit. If it looks good, I'll encase the LED and fiber ends with a larger glob of Bondic glue and cure it with the UV light, then I'll paint the blob black. This helps keep the maximum amount of light contained in the tubes.

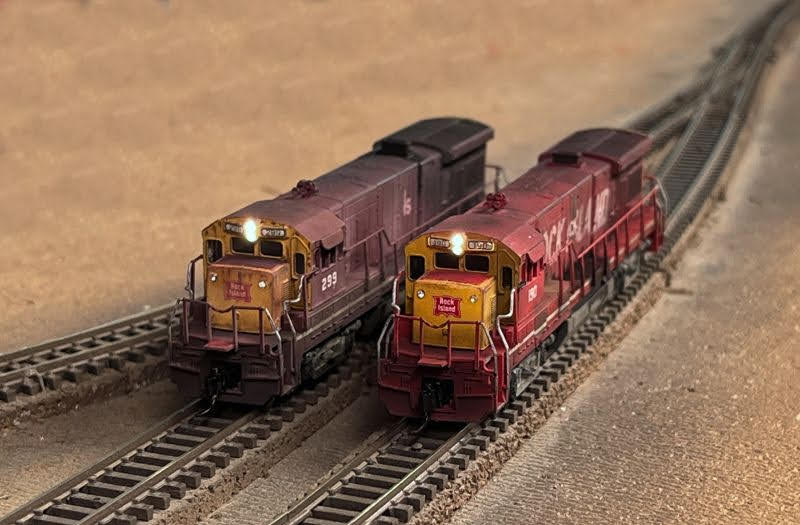
Here's the end result, 10x better than the factory lights!
Nice job you can really see a difference
ReplyDeleteThanks! They're like 10x brighter!
DeleteExcellent, Allen, and the results are worth it! Always appreciate your well-illustrated posts.
ReplyDeleteThanks Anonymous!
Delete