
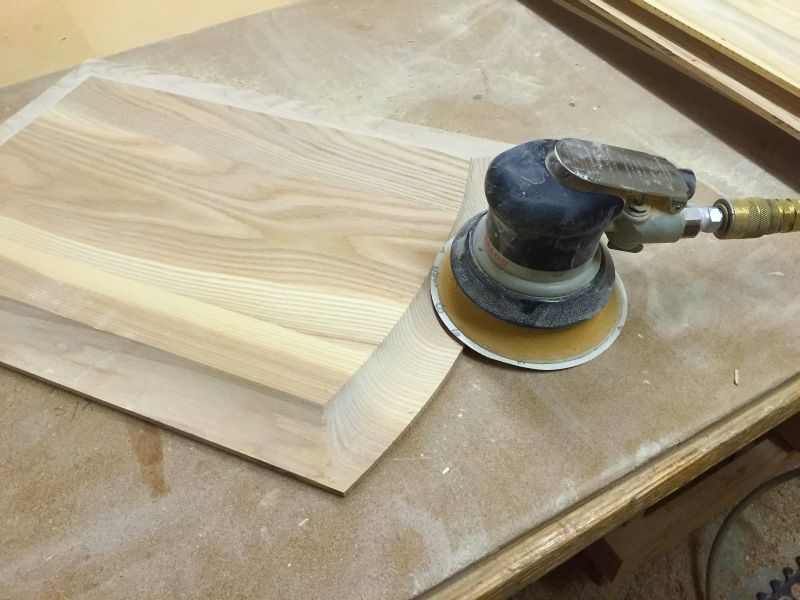
With all the panels shaped and raised, it's time to sand the panels.
I use a pneumatic Dynabrade random orbital sander for this job. The pad is flexible enough to mold to the convexed shape. #180 paper makes quick work of this job. I sand both the shaped portion and the back of the panel. The front will get smoothed up when I run the doors through the Wide Belt sander later.
Once all the panels have been sanded, I stained the outer edges of each panel. Doing this will keep from having an unstained lined appear months later when the panels expand or contract with the seasons.

All stained and stacked up in an ascending order ready to be mated up with the stiles and rails.

Before mating them with the panels, I insert a 5/16" x 5/16" x 1" Panel Buddy. These are made of fairly stiff, but flexible foam rubber and is used to keep the panel centered in the frame. It also allows some expansion and contraction of the panel. Some guys do not use these and only make the panels about a 1/16" to 1/8" less than needed. Buy my OCD tells me to use them as not only will keep the panels centered in the frames, it also keeps them from rattling inside the frame.
I guess it's a personal choice...

A completed frame ready to match to the panel.

A short while later I have them all mated and stacked, ready to assemble.

I grab the first two doors, a pair, and lay out the pieces prior to gluing.

Assembled, ready to go to the clamp


The first door is done.

30 minutes later I have all 16 doors on the cart, drying.

Next up, running them through the Wide Belt sander...
what a lot of work. I admire your skill and your perseverance.
ReplyDeleteThank you Gene!
DeleteHow about when I get this done we get together and do what it looks like you're doing in your Avatar? Right now that looks like the ticket.
looking good.
ReplyDeleteRod.
Awesome looking progress!
ReplyDeleteThanks as well Karl! Good to hear from you as well.
DeleteI need to set aside some time and re-read thoroughly your last two post about the ops session, Looks and sounds like fun. And the progress on your models is looking awesome as well.
Awesome stuff! Great to see a true craftsman!
ReplyDeleteThank you Steven, thanks for the kind words.
Delete