Tuesday, January 16, 2024

Rock Island airslide hopper

Once again, going off on another direction, I'm taking a bit of a break and trying to wrap up another smaller project that I found buried on my workbench after cleaning up from the barn build.  

Delaware Valley released some of these blue Rock airslides in N scale a long time ago, but when BLMA released theirs, the difference in fidelity was night and day difference.  Then when Atlas bought BMLA out, I've been waiting for them to release some in Rock Island, which they have, a stacked block lettering.  Recently I did several up in the 70's speed lettering, but I still wanted a blue car.  

Joe at MTL said they were still planning more of their versions of airslides and would put a request in for a blue version when I asked him recently.  Nothing against Joe or Atlas, but I have waited long enough and with a bit of time to kill due to a snow storm that rolled through here, I have a couple of days off to make something happen.

I started out with a couple of Cotton Belt cars.  I removed the lettering with a toothpick and some 70% alcohol, cleaned them up and dismantled the trucks and couplers.  

I first shot a primer coat using TCP light primer. 

Followed by a coat of  TCP-166 Rock Island Blue.  Once it had dried I gave it a shot of thinned Dullcote so that I can start applying the decals. 

Even though I'm not looking forward to applying all those DATA decals, it should be a fairly easy project.  Easy yes, time consuming, OMG....54 decals per car!

But they're done!


Now Atlas or MTL will release their version...


Saturday, January 6, 2024

Wrapping up the barn

I got the last of the corrugated sheets installed on the roof I then set about to weather it.


I painted the roof  with a coat of Vallejo Neutral Gray and let it dry overnight, after which I sealed it with a heavy layer of Dullcote to seal it and give the surface some tooth.  Then applied a layer of P3 Armor Wash and let it dry overnight.  The Armor Wash is kind of similar to a black wash, which can be left on if desired.

In my case I used a "Q" tip, damp with alcohol and wiped of the biggest share of the Armor Wash so that it just highlighted the grooves (yeah the lighting sucks and doesn't show the difference very well).  When this was done, I sealed it with another coat of diluted Dullcote to seal the Armor Wash in place.


Now came the fun part; the rust.

This time I decided to try another approach to apply it rather than to lather on oil paints and then wiping them off for a finish.  I started with the craft acrylic paint: Burnt Umber, Burnt Sienna and Deep Yellow Ochre.

I started off making a wash from the Deep Yellow Ochre and added a tinge of Burnt Sienna and applied this over the entire roof and wiped off the excess with a "Q" tip.  When dry I used a Deer Foot brush to stipple on straight Burnt Sienna in patches.  After that was dry I applied the Burnt Umber in the same manner.  With each color I used less and less to build up layers, applying them to the bottoms and corners of the metal panels.


Once this was done, I came back with some pan pastels and dusted some of the panels for a slight variation in color.  I also applied some Pans to the rest of the outer face of the barn to give it that weather worn look like I did before.

After this was all done, I applied another diluted coat of Dullcote to lock everything in place and used an Exacto to slightly bend up some of the corners.


So far, so good.

Lying in bed I got the idea to try something different.  While it's an old barn and old house, something just seemed to be missing?  These would look great in a dry western scene, but since these be will located in Louisiana, which can get humid and damp, I'm thinking it should have some moss growing on it?  Not much, just a trace.

So grabbed more craft paint and started adding a bit to the house first.  I started out stippling on tiny bit of black to block the area, then I grabbed some dark green and mixed a bit of black to darken it a bit more as I didn't want it to stand out as green as a lawn.  Once this was done, it looked a little to flat, so I used the deep yellow ochre, added a bit or green and lightly stippled it around the patches, just enough to see small dots.  


I liked that, so on to the barn...


With this project to a stopping point, I can now start laying out the positions of the buildings for the abandoned farm scene and know where I can start carving the floral foam to its final shape.


Sunday, December 31, 2023

The Barn's roof

One thing I wanted to do to this barn was give it corrugated metal roof.  

I found some online from a company that showed some, but was unsure of the actual size as they just said it for "HO & N".  So I took a chance and I got lucky.  Looks close enough for me.

I glued roof to the barn with the roof supplied by Showcase Miniatures so I had a good solid base to work on and to help keep the kit structurally sound.

I started by cutting the material into roughly 3' x 10' strips.  It's pretty heavy foil and it doesn't seem to flatter out like typical foil would.

So I got started, piece by piece....


Once I get it all glued on, painted and weathered, I'll come back and beat it up a bit and bend up some of the edges for an aged, wind blown looked.


Monday, December 25, 2023

Barn weathering

As always, I get ideas as I'm doing something and decide to strike out and see what I can do with the idea before the project is finished.

After getting the outer facade applied the structure, I got to thinking about how best to weather it?  I thought about washes but with cardstock I wasn't sure it would be a good idea to apply something wet on it.  So I dug out my trusty Pan Pastels and started playing around with some on the scrap portions of the kit.

After getting an unseen area coated, I decided to go for broke and try the facade.

Here's the raw facade.

Here it is after applying some Pan Pastels.

Here are the four colors I used:  

Orange Extra Dark    Neutral Gray

Raw Umber               Raw Umber Shade


I sparingly applied the Neutral Gray in a random pattern.  Then applied the Raw Umber in the same way but a bit more heavier and blended the two together.  I used the Orange Extra Dark along the roof overhang to highlight where the sun didn't beat down on it.  The Raw Umber Shade being a bit darker was used along the bottom to show dirt splatter.

I'm kind of thinking about dry brushing or using a sponge to add some remnants of white paint?  

I'm also kind of wondering if I should use a darker gray since the area I'm modeling is not in a dry, arid climate?  The darker gray may give it a damper look with a bit more moss?


Saturday, December 23, 2023

The barn

After a few months of a modeling pause, I tried to get started back on the barn (a kit by Showcase Miniatures) for the farm scene by Winnfield.  

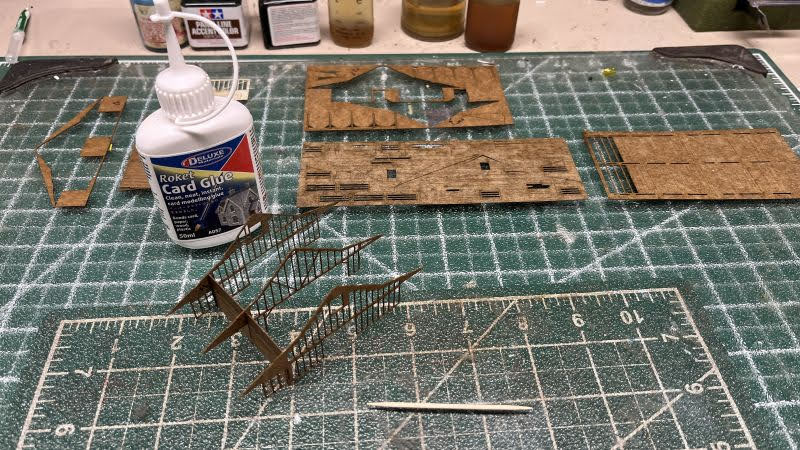
I had ordered some Roket Glue by Deluxe that's supposed to be designed for Cardstock models.  This stuff is advertised to work on paper/cardstock kits and have a pretty quick bond?  We'll see...

Anyway, I got the first four walls up.


Sunday, October 22, 2023

The Farmhouse weathering Pt2

Found a little time to work on the farmhouse a bit more tonight.  I got the chipping done on the walls and shingles, touched up the holes in the roof and added some dirt to it.

While I still have some more details to add, I'm sticking a fork in the house for now, this way I can move onto the barn and get it a solid footprint.  This will allow me to start terraforming the foam where the farm will be.  


Saturday, October 14, 2023

The Farmhouse weathering

After getting the house looking like it's falling apart, I finally found some time to get back to it.

The first thing I did was to get a couple of holes in the roof and add some roof joists.  Then I used two shades of gray Vallejo to simulate the aged wood that will be showing through when I start chipping the final paint coat.  For the roof, I brushed on some Vallejo Tire Black.


Once that was done, I sprayed a couple of coats of AK Heavy Chipping Fluid on the entire model and I let it dry completely before I sprayed a final coat of Vallejo Off White for the house and some Vallejo Light Gray for the shingles. 


The shingles look a little light, but by the time I add some darker wash and rub some of the Light Gray off, it should darken down a bit.

I'll let it dry before attacking it with a brush and toothpick to get the chipped look for the paint and weather worn shingles.


Sunday, October 8, 2023

The farmhouse

After getting the foam glued down, I figured I should try and figure how much room I'm going to need for the farmhouse, the barn and the other little outbuildings before I start shaping the foam as I'd like to leave that area flat.

With that in mind I started working on Delony's Barn from Showcase Miniatures, but moved it aside as I ordered some Roket Glue Cardstock glue from Deluxe.

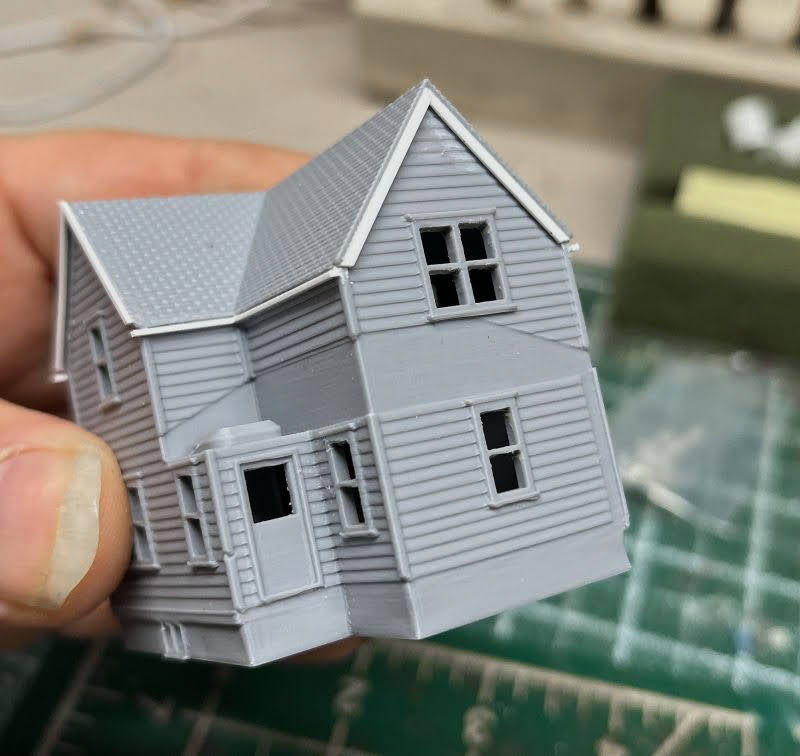
While I'm waiting on that to arrive, I pulled out the 3D printed farmhouse that I snagged off eBay recently.  It's not a bad model and it's my first 3D kit I've worked on.  I think it's a resin print?  It was under $20 with shipping so I figured it wouldn't be all that good, but it actually ain't too bad.

Even if the print quality wasn't very good, seeing how I plan to make this into an abandoned farmhouse, I'll be covering most of it with weathering and what shows through should add to the dilapidated appearance.


I started out by filing the inside of the windows, cleaned up some fuzzies that were left between the porch railings and spindles, sanded the porches and roofs so they fit a bit tighter, but like I said, since this will be in the process of deterioration, I don't see the need for perfection here.

I watched a video by Boomer who did an old farmhouse similar to this and tried to follow him for some ideas to add a bit of detail.  The first thing I did was to add some fascia on the gable ends and some gutters and will add a few downspouts as well. 

As you can see in the last image, the window frames are rather rough, but for what I plan to do to them, it shouldn't matter much, plus it should add to the deteriorating look.


As I mentioned earlier about the windows, I wanted them boarded up.  Not sure if I'll board the upper windows or not?   


The next thing I worked on was the porch railings, I wanted them in bad shape.  I cut and broke some of them, then glued them back in place. Some of the others I warmed them up with the help of a lighter so I could bend them slightly.


I have some plans for the roof, but I'm working on that now.