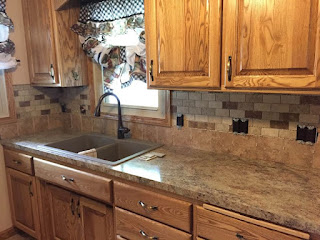
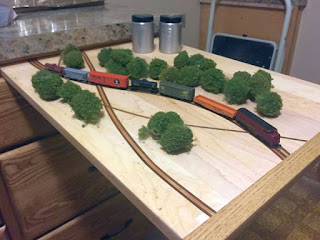
With the kitchen project behind me (thank God) now comes the part I really hate.
Doing all the little touch-ups and cleaning up the mess that was made during construction. While I really want to get back to the basement and lock myself in, I can't.
Tonight I had to do some little touch-ups in the landing: painting the new trim around the steps into the kitchen, and while I had the brush and paint handy I had to touch-up the casing around the outside of the entry door that I put in several years ago before it rots out. Well not really, as it's on the inside of the door. But if I don't, the small strip of raw wood will haunt me every time I walk out that door. So no time like the present.
Next will come the garage, this shouldn't be too bad or take too long. The place looks like a war zone from about three years ago when Lisa moved in. She's gone through a lot of her stuff and I need to go through what I have and then see if we can stash it in the garage's attic. What scares me is what's up there that I can't remember, ugh. But it's still a little too hot to be doing that, so if I can at least get the garage floor cleaned up so I can at least park in there again I'll be a happy boy.
Then comes the basement cleaning! All of the dust, wood chips and other crap that sifted down from the kitchen while the base was torn off needs to be addressed. My work bench is directly below the kitchen and of course I didn't bother clearing it off or put a cover over it before getting started. This will give me an excuse to clear off the workbench and give it a thorough cleaning that it's been begging for. Once again, no time like the present.
I've also got two other major personal projects that will need to be worked on, but at least there really isn't a deadline on those, albeit sooner the better!
Now directly regarding the trains and the layout, I have a long list of things to do.
The first and foremost is to get down there before the dry season and static electricity returns and concentrate on replacing a couple of small electronic pieces. I have a PM4 and PM42 that I want to replace with some PSX circuit breakers and one PSX-AR. I picked these up not too long before I started on the kitchen. I think I know where I put them???
I also want to get another ops session worked in shortly, at least before winter sets in so I may wait until after the session since everything is working right now. But before any of that can happen, I need to clean the layout off, both the tracks and layout as it became a catch-all during the remodel.
Other major things that I have planned are some serious track work and re-aligning.
I want to redo several sections of the main for operational improvements. Quin, Doug and I have discussed this over the spring and summer months.
These include:
Lengthening the siding at DuBach, removing one of the two sidings at Ruston Jct. and re-aligning the junction track, adding a new stub siding in Winnfield, try to realign the track to the North of Haskell (behind Riceland and through the backdrop), add a new fertilizer plant between Fordyce and Haskell, move the siding for Flappers away from the main so I have room to add some street running as well as realign the south end of MQ siding at Calion before adding the Ouachita River bridges.
The siding at DuBach will be lengthened so as to match the length of MQ siding. This will be done by moving the south set of turnouts just south of the ARKLA siding. The reason for this is two fold. I plan to add a couple of trains to the schedule. I want passenger service on the Little Rock, but have decided to use TOFC's or fast mail trains and tack on a few passenger cars to the rear of each for both ops and for looks. If things go as planned these will meet on the layout at El Dorado. One can hold in either MQ or DuBach siding while the other one works El Dorado. We'll see how the schedule works out?
Also by increasing DuBach siding this will give us a bit more room to spot cars that are pulled from the DuBach industries and are left sitting on the siding while the Winnfield local continues it's run to Ruston and Winnfield with just the cars that are needed. We do this now, but if the number of cars are high, DuBach gets a little tricky to work.
Speaking of Winnfield, by adding a small stub siding opposite of Union Scrap I'll be able to move the cars that are spotted on the End Of Track that we exercise their journals each session off the main and on to the siding. Instead of placing random cars at the EOT I plan to spot ballast hoppers and Difco dump cars there. These may be used during the sessions as extra train movements for another operation we talked about. This should provide us with a bit more room while working Winnfield.
At Ruston I originally laid the junction with two sidings for a run around. Since we changed how the Rock and ICG work the junction, now only one track is needed. We discussed leaving both sidings in place and use one for MOW storage, but I was never really happy with the over all alignment of the Junction.
The track behind Riceland Ind has always been a little sharp. I laid it with two sections of 11"r snap track and have always regretted it as longer cars such as auto racks and TOFC's will sometimes derail going through there. It more or less becomes a dreaded "S" curve as it comes through the backdrop. I'm hoping I can broaden the radius and realign the track on the Winnfield side of the backdrop as it enters the yard and across the diamond. Doug and I discussed this one night and I think we have a plan?
Realigning the south end of MQ siding goes hand in hand with adding the Ouachita River bridges. Right now between El Dorado and Calion is the longest tangent on the layout. As the track curves out of the north end of El Dorado and heads north, I want to add the Bridges to the mainline and to the yard lead.
Why a bridge on the yard lead?
Well I made the excuse that the lead was actually an abandoned track that was either a branch line or old industry lead.
I thought it would look aesthetically pleasing if I had the track swing towards the backdrop just a bit, go over the bridge and then swing back and align with the south turnout of MQ siding and the Calion lumber siding, which will need to be re-laid with different turnouts. Hopefully things will flow through the siding better after doing this.
Last but not least, I have a large amount of real estate between Fordyce and Haskell. At Fordyce the Fordyce & Princeton RR crossed the Rock Island. Since the only place I have to do this would be on a curve, I decided I would model the area with the diamond ripped out and say that the F&P ceased operations. Then after widening the right of way through Fordyce and move the Flappers siding, I will try to find somewhere to lay in a new turnout that will connect to the old F&P track so as to still be able to service the new fertilizer plant that sits on the old F&P main.
The addition of the fertilizer plant came about as the Haskell turn doesn't have near the work load that the Winnfield turn has. So I was trying to even out the work load for the two turns.
I know this is a lot of work ahead of me, but after running ops on the layout for a few years, this should improve the overall operations of the layout? Or at least this is my hope.


