
I made good use of the last day of the last four day holiday weekend of 2015.
This morning I was able to get the door panels out of the clamps and planed down to 5/8" thick, followed with a few trips through the widebelt sander using a 180 grit belt to smooth the panels up.

Using the sliding table attachment on the tablesaw, I squared one end and trimmed the other end to length then got them piled back on the cart. For now that's as far as I can go with the panels until I get the arches laid out on the upper door rails.


The next step was to get the door frames milled with the shapers for the cope and stick profiles. The vertical stiles are on the right of the cart and the horizontal rails are on the left side.

To do this I have two shapers set up, one for the cope profile and one for the stick profile. The cope is done on the ends of the rail using a sled with a hand clamp. The pieces are inserted in the sled face down.
Next I ran the Sticking and the bottom rails [the top rails will be arched with a separate operation] through the second shaper to cut the sticking profile.
On this shaper I have a power feeder attached as I run the pieces face down with the direction of the cutter head. This is the opposite direction than one normally would run through a shaper, it's called "Climb Cutting".
While this image shows the operation using a hand router, it's the same process when using a table shaper.

This is the reason for the power feeder, it keeps the pieces held securely to the table and against the fence, otherwise the cutter head would grab the pieces and shoot them out of your hands.
Why do I do it this way you ask?
Climb cutting allows one to shape the material without getting any "Blowouts or Tearing of the grain". With a climb cut, you don't get the splintering that you often get with a bit or shaper head fed counter-clockwise.
Climb cutting also has a burnishing effect on the wood, leaving an exceptionally smooth routed surface. I also hate having to make pieces over due to the blowouts or tearing.
This is what you get after the parts have been run through both shapers, I nice snug fitting joint.


Now that I had the stiles and bottom rails shaped for the cope and sticking, arching the the top rail was the next step. Using patterns and a pattern jig I placed the smallest top rail in the jig and sized it up with the appropriate sized pattern.

Marked it with a pencil
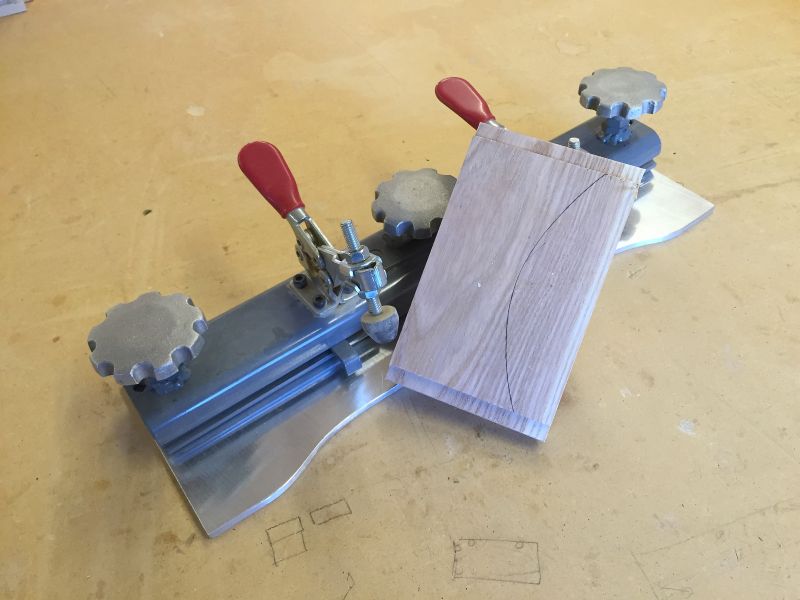
Then cut it on the bandsaw to get the majority of the material removed.

I repeated this step for all 13 pieces and took them over to the shaper that I used to cut the sticking profiles. For this operation I removed the entire shaper fence leaving just the spindle showing with the cutter head.
Just above the cutter head you can see a large silver bearing, this bearing rides on the pattern acting like the fence. This allowed me to shape a curved piece of material with the sticking profile.
When I got the first rail shaped, I assembled a test frame to make sure things were fitting properly.

All the frame parts restacked on the cart, ready to assemble once I get the panels done.

With this step finished, I can now grab the corresponding patterns for the door panels and using a similar method, I can start arching the tops of the panels to match the top rails.
But that will be for the next post...
Jump to A New Kitchen part 6


