
Awhile back when I posted about the Wheel Report I planned to use, I also mentioned that I had looked at and played with a few other forms of car forwarding. One of which was the Tab-On-Car system. My biggest complaint about this system was the fact that I thought it may be a visual distraction from the scenery [of which I have very little at this time].
Trying to think a step ahead of myself, I shyed away from this method when looking for a car forwarding system. But now, several years later I have found myself intrigued with the tabs.
A few months ago my friend Steven Johnson, owner of the Rock Island; Ottawa Sands layout, decided to take the plunge into the tab system and I anxiously watched and waited to see how he and his crew felt about it after he worked up a plan to use them.
After his first session it was a unanimous decision to keep the tabs on the Ottawa Sands Division. So, after conversing with Steven about it and trading some emails with Mark Dance, the decision was made to try the tab system to the Little Rock line.
Last weekend three of us put the system to a test and I'm pleased to announce it will become the car forwarding system on The Little Rock Line. However I am not giving up on the Wheel Report as I will continue to use it as a traffic generator. All I did was to modify a section of the spreadsheet so that it also spits out a random list for pick ups as well as set outs. This was one thing I never had with the Wheel Report. In the past the Wheel Report gave us a list of setouts only and any pick ups were up to the crews to decide which and how many cars were to be picked up during a session.
Now I can run the generator and have it give me a list of cars that need to picked up and I can place a tab on those cars.
The entire system is still based on car types as opposed to car numbers. Even though this helped us greatly, our eyes are showing their age and it's getting harder and harder to read the numbers on the cars. We still had a few crews who struggled to identify certain car types, but now with the tabs, the only thing they have to worry about is to match the colors of the tabs and know what the lettering means on each tab. It also reduces the amount of paper sheets I need to print out: 3 as opposed to 11.
The test session went off without a hiccup! Every cars wound up where it was suppose to. There was no confusion of car types and we even had something we never had before; Car Offspotting!
Several industries did not have any cars to be picked up, but they called for cars needing to be dropped off. The crews handled this quite well.
Since there was only three of us this time, we decided to omit the through traffic and just run the work trains Quin took the El Dorado yard job and the Winnfield turn. I got to run the Malvern Job and Lynn and I worked the four manifests and what was left. We were all very curious to see how things would work out. One thing I wanted was a warm body who wasn't too familiar with the layout or how things worked. I figured this would give us some good feedback as to how easy or hard this system would be for a newbie without a lot of instructions.
The following pics are from the test session, enjoy.
From the beginning
Everything is staged and ready!
In Biddle yard at Little rock, the LRMP-W is on ready track #1, on #4 the LRMP-H waits for it's call. A Rio Grande SD45 is in the consist.

In Alexandria, the MPLR-W and MPLR-H are sitting on ready tracks #2 & #3. More foreign power is in consist on the MPLR-W, this time a Southern Pacific SD45.
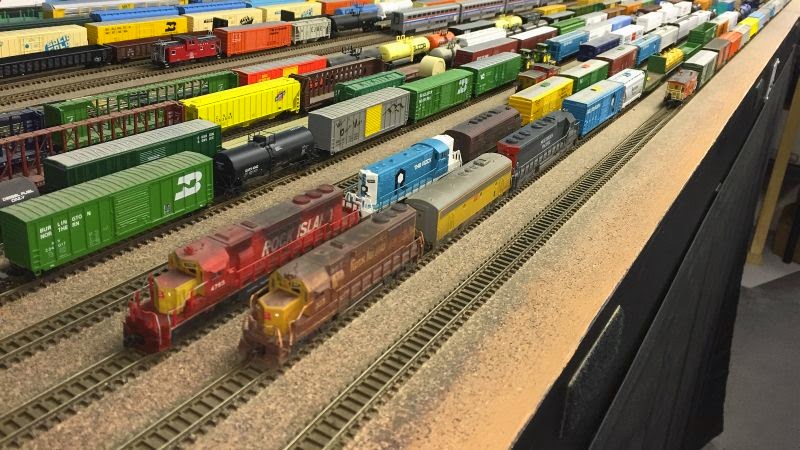
Starting at Winnfield and working our way north, Union Scrap has the max amount of cars in their siding, with one to pick up. The boxcars at the right are the four cars that are sitting at the End Of Track in storage, these will need to have their journals exercised. The Winnfield turn makes this a part of the routine on every trip to Winnfield, after which they break for beans before heading back north.

Sitting in their yard, which will be partially camouflaged by trees in time, the ICG local awaits the Winnfield turn so they can make the swap at the interchange at Ruston. Today they have a larger than normal amount of cars for The Rock. Generally they have about 3-5, today there is 7. This time their crews were awake! They put a pulpwood flat between the last tanker and the caboose.

ARKLA Dist. has three empties ready to pick up.

No open hoppers are moving at A&A Cement today but the silo track has two ready.

All three cars are due for pick up at Piggly Wiggly Dist.

As normal, looking from the south end, the yard at El Dorado is full of outbound cars in the early morning, but this time the yard crew needs to sort out the cars that are due for Northbound and Southbound trains and not just grab a string of cars!

Everything is ready at the house tracks. GP7 #4464 has been assigned for the El Dorado switcher.

A glance at the North end of the yard, everything looks ready.

Still heading North, Calion Lumber Co. at Calion, AR still has some unloading to do yet, none are ready to be picked up.

At Fordyce, Dixie Woods has one ready, one tank car at the litter track and there are two empty chicken coops at the slaughterhouse.

At Haskell, Ghuntz Implements has one ready.

Things are kind of slow at Riceland today, only three empty hoppers and one airslide is ready to move.

Moving over to Malvern, Ohlin-Chlor has two tankers that are loaded.
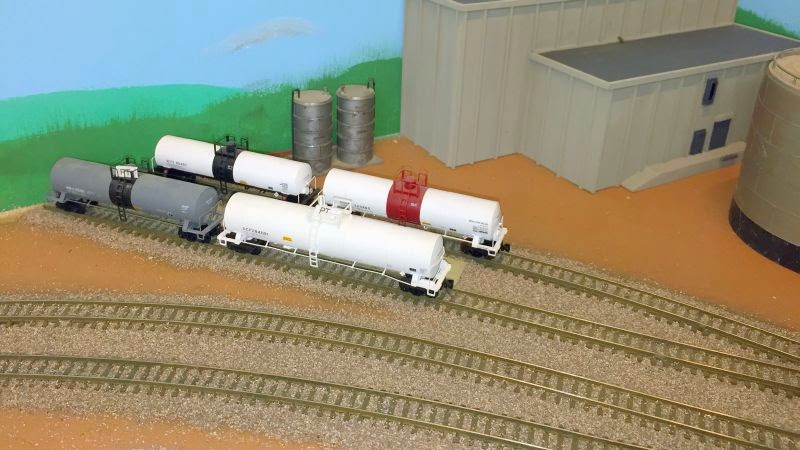
Nothing to move at Heavy Metal, these three are still waiting to be unloaded.

Although it's hard to tell, Crushmoore has two loaded chip cars ready to go.

Looks like the W&OV switcher will have his work cut out for him today! Effen Recyclers has two loads, Gritty gravel has a couple ready for transport to A&A Cement and Crushmoore has three empties bound for the ICG.

With everything ready to go the 7am whistle blows at Biddle and the first train (LRMP-W) leaves the ready tracks and makes it way through the yard via the rear bypass track on it's southbound journey.

As I bring the LRMP-W south towards Haskell, Lynn has jumped aboard the Riceland switcher and begins to gather up the few cars for the Haskell Turn later this afternoon.

The LRMP-W arrives in El Dorado and I'm shoving the setouts on to A/D track 1. Quin looks like he has the yard pretty well cleaned out already.

With the pickups tied back into the train, I head the LRMP-W south through Dubach. I'm on the siding which means there's a problem or someone forgot to reset the turnout at North Dubach?

Back at El Dorado, Lynn has finished with the Riceland job and is now at the throttle of the first Northbound of the day, the MPLR-W. Looks like we just caught up with him as he's making the first cut. Quin is bringing in the cars off of A/D track 2 that the LRMP-W left a bit earlier.

Once he gets them cut loose, he'll jump to the next track over and grab the cars off of A/D 1, then he's off to North Little Rock. After he clears the yard, Quin will go about sorting the cars, first for the W&OV at Malvern, then he'll start blocking cars for the Winnfield Turn.

Meanwhile back at Malvern, I'm at the throttle of the W&OV switcher and going about gathering my batch of cars. Today it's the second hand Lehigh Valley RS11 #7641. This was the first time I've worked Malvern since operations commenced on the The Little Rock Line.
The first thing I did was to grab all the cars from the West end of town; Effen, Gritty Gravel and Crushmoore. I left them on the siding so I could grab the loaded tanks at Ohlin-Chlor and then make a dash out to Ghuntz Implements to get an unloaded flat car.

Wait a minute? I thought this was suppose to be an empty flat, what the hell is this? Aquaman? Not sure what this movement is all about, but I hope he's tied down properly.
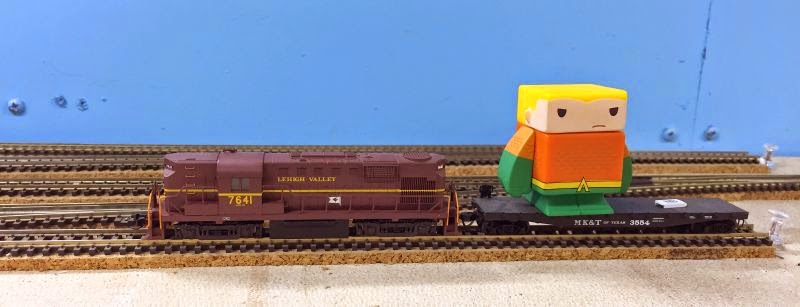
With the cars gathered up and the caboose tied on, I parked the switcher and grabbed the three road units and tied them on the head end and made my way to the junction at Haskell.

At Haskell I pulled up to the south switch and waited for the call from El Dorado.

A short jaunt later and I'm at El Dorado, heading down A/D track 1. I'll cut loose and run around my train on the main, then back onto the cars on A/D 2, pull forward and grab my crummy and head back North to Malvern.

After returning to Malvern, I pulled the train onto the siding, cut of the power and back into the house. Before I start making the setouts though, it's bean time.

By the time I caught up with Quin, he had most of the switching done in Dubach and was preparing to head to Ruston. He left the three reefers that he pulled from Piggly Wiggly on the siding at Dubach. This allows him to have less cars to drag down to Winnfield which has a shorter siding. Before leaving though, he'll set the two cement hoppers out with the reefers so he'll only have two gondolas for Union scrap to deal with.

I brought the ICG local to Ruston in preparation of the combined switching move needed to set out the tanks and pulpwood flats as Quin uncoupled from his caboose.

I ran the ICG out onto the RI main, backed up to the Winnfield turn to start the process.

Since there were no cars to be exchanged with the ICG, I pulled the cars back onto the junction so the Winnfield turn can simply grab them on the their return trip. With everything done the Winnfield turn pounds the diamond in route for Winnfield.

For a complete explanation of the combined Ruston Interchange, you can go to this page and scroll about halfway down.
Or you can just watch the video here.
Arriving in Winnfield, the first job is to exercise the journals on the stored cars. First though, Quin needs to run around his train and and then grabs them from the end of track and pulls up to the spur at Union Scrap.

The last car is set out on the spur.

The rest of the cars are then pushed back onto the old main.

He re-couples to the last car and places it in front of the other three.


....and shoves them back to the end of track. The one loaded gondola is extracted from Union Scrap and one is set out. Since there were two empties called for today, Quin spotted the original two empties back on the spur with one of the two new empties, and left the fourth one on the main for off spotting.
This is a new procedure for us on the layout as we never had to deal with TOO MANY cars before. We would only pick up the amount that was being set out. As Steven told me later; "This will add a whole new level of operation to your layout."

Preparing to leave town, the last thing to do is to place the crummy on the end of the train. The siding at Winnfield was made a little too short when I originally laid the track out. Once we figured out that we could leave some of the cars on the siding in DuBach and with the intended revamping of the tracks at Ruston, it has wound up being a great compact little challenge.


On it's return trip North, the Winnfield turn stops to make two last moves; switch out ARKLA dist and then grab the rest of the cars that he left on the siding.

Judging by the smile on Quin's face, things are going quite well.

Another first, we had two reefers that needed to be set out at door #3 at Piggly Wiggly so we used the team track and the dock workers can now lay a platform between the two cars to access the outer car.

With the Winnfield turn back at El Dorado, Quin resumed with the switching at El Dorado and I returned to Malvern to start dispersing the cars I had brought earlier. The first move was to replace the two woodchip hoppers.

Then the two tank cars at Ohlin-Chlor. I then shoved the crummy onto the main and coupled to the two hoppers.
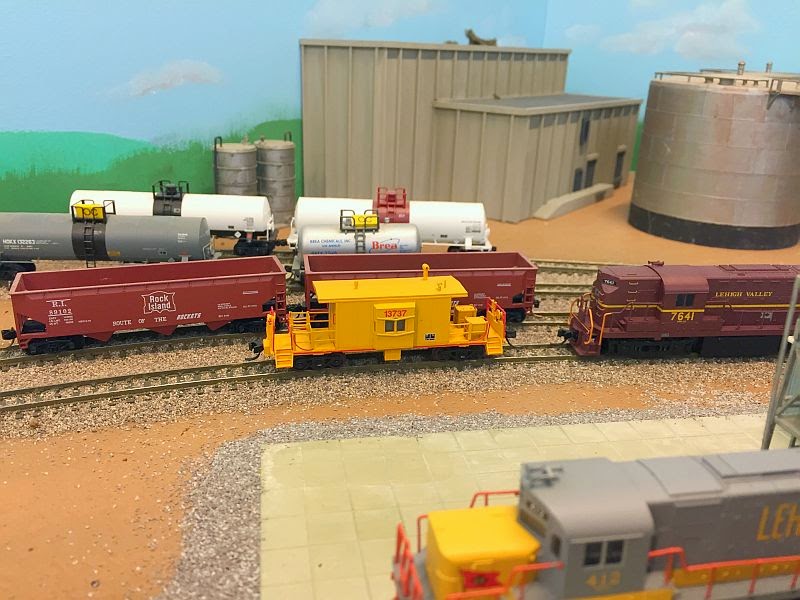
I pushed them down to the three cars I left by Crushmoore and continued shoving them down to the West edge of Malvern.

Spotting the boxcar, flat car and coil car on the main, I then spotted the two empty hoppers on the siding.


I cut the boxcar off and pulled the flatcar and coil car back to Heavy Metal.

Again, another first. Since I had no room for these two cars, I left them on the main next to the siding at Heavy Metal and and went back to pick up the crummy I left on the main and then parked the RS11 at the engine facility and punched the clock.
After working this job for only the second time and getting a good feeling for it, I now understand why there always seems to be a fight for who gets to run it. :)

It was now time for the second Northbound manifest, the MPLR-H to arrive in El Dorado to drop off the first section of cars bound for El Dorado and the Haskell Turn. 4793 is shoving the set outs onto A/D #2.

Quin is clearing things out and getting the outbound cars ready for the LRMP-H which is due to arrive shortly.

The LRMP-H has just pulled from the ready track.

Passing the Riceland complex at Haskell.

I didn't get back in time to see the LRMP-H set out his cars, but Quin has started blocking the Haskell Turn.

For the Haskell Turn I planned to use Steven's newly shopped out, Bachmann GP7's that I placed over Atlas DCC ready chassis and give them a good, thorough shakedown.

Their tied on and pumping up the air.

As they begin to pull the El Dorado switcher meets them on the yard lead.

I didn't get any pics of the work in Fordyce, but will on the return trip. I pulled into Haskell on the siding and am running around the train on the mainline.

I eased them onto the Riceland spur to grab the cars that Lynn set out earlier in the day.

After putting them on the second siding (the one to left of the tank car), I grabbed the three empty hoppers to spot on the elevator tracks. This is kind of a rare shot for two reasons. One, this is probably the first and last time I'll see these two units on the Little Rock and normally, the Riceland switcher spots the cars. But since we were short handed today, I just used the turns units to do the work.

In Fordyce, I stopped the train on the main and grabbed the two empty chicken coops from Flappers slaughter house first, then I'll spot two reefers on the Cold Storage track. The MoPac box and the tanker in the distance is what I spotted on the way through earlier.

More offspotting. Calion Lumber wasn't done with these four cars, but we had orders to drop off three more. With no place else to set them, it looked like the lead was going to have to work.

Everything seemed to fit quite nicely. I'm curious how this will play out on the next session. Considering this session was planned with a light run, the next session could be heavy depending on how the spreadsheet spits out the list?

With the Haskell turn back in El Dorado, the session draws to a close. Everything pretty much went off without a hitch. The three of us were very happy with the way the tabs worked, so it was decided to press forward with the use of them in conjunction with the Wheel Report as the generator. Even Aquaman seemed to agree, or was he just happy we didn't dump him somewhere?

One major foul up on my part, I forgot to re-align the turnouts in the yard and I ran the LRMP-H down the wrong track! Oops.

There were go, much better.

I must admit, the one thing I was expecting was for some of the tabs to slide off some of the cars during their travels, but not one was lost.
I do plan to revamp some of the tabs and do away with the white PT (Pool Track) tabs. These PT tabs were designed for the few cars that are captive service cars that do not ever return to the main yard. I will just use the proper colored tabs that will show what spot they're heading for when I restage the layout and start setting the White tabs on the cars.
For instance, all of the car that were on the ICG will be dropped off in El Dorado. These use to go and sit on the Pool Track and would be drawn from for the next session. So I had originally planned to put the white PT tabs on them at the start. But since I didn't have enough of the PT tabs this time, I just used the yellow tabs that had the marking for OC (Ohlin-Chlor) and CP (Crushmoore Pulp). In doing this, these cars can now sit on any of the four tracks in El Dorado and will not get mixed up visually since they will have the the proper tabs on them for the next session.
I'll probably have to have Steven print me off some more NB, SB, OC, CP, GG2, AAP labels as these are all the captive service tabs. This way I'll have enough to spread out over a couple of session.
A few shout outs to Steven for the all the help with the tabs and the info and another one to Mark Dance. Two more to Quin and Lynn for helping with the dry run.


