Thursday, August 8, 2013

Ops session #6, two days and counting.


I'm really getting anxious as Saturday draws nearer for several reasons:

We might have a few visitors this time,
Wondering if the new Wheel Report will have any bugs that will appear.
I've added a bunch more locos with chips, enough that most trains will now have a three loco consist per train.
Along with the newly added locos, I'm almost to the point of having a solid Rock Island roster for the op session.
I was able to get a newer laptop set back up and also got JMRI reloaded and running so I can monitor LocoNet if needed.
I got the RRampMeter installed which will allow us to watch the voltage and amps during the session.
And finally, I gonna try to get some photos during the session as well.

This time we are meeting at 6pm instead of the normal 7pm, hopefully we can finish a little earlier without having some of the guys needing to leave before they turn into pumpkins!


Tuesday, July 23, 2013

Ops session #6


Things have been moving along nicely, I got the living room finished and cleaned up several smaller nagging jobs that have been laying on the workbench, so Saturday, August 1oth will be the next session.

A couple of weeks ago Doug and I got all the tracks cleaned,  last weekend I managed to get all the locos MU'ed and readied for their respective trains.  This weekend I got another session printed from the newly automated Wheel Report.
That was soooooo cool!  [thanks Steven]


Another project that I finished was getting my RRampMeter ver1 mounted to a panel and tied into the layout so I can monitor the Volts  & Amps being drawn during a session.  It's another project that has eluded me until now.


The last two things to do is stage a few more cars and then I'll work on getting the new laptop setup with JMRI installed.  This will help with monitoring the layout along with the RRampMeter.


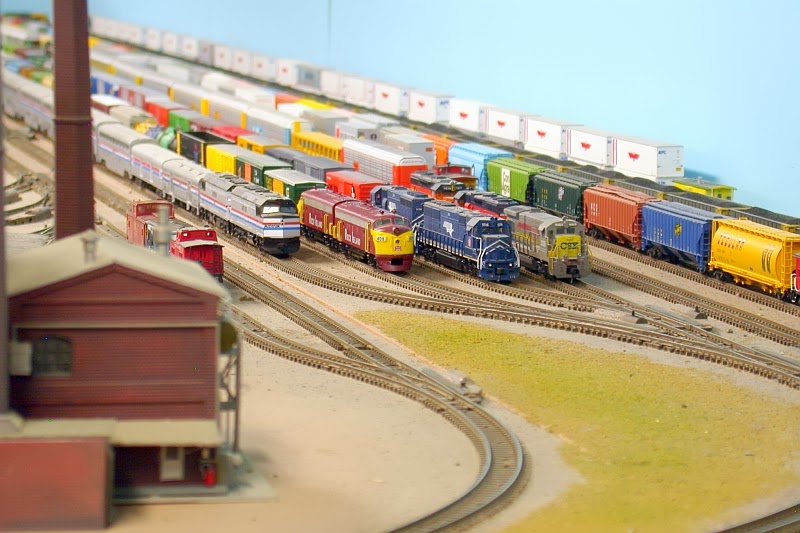
Here's a few shots of the two yards with everything ready to roll.

The Main yard 
A Clean GP38-2 heads the SB LRMPW while the LRMPH is
going to get a little help from an Eastern visitor.


Some veteran power will be assisting on the 
NB MPLRW & MPLRH manifests on this run.


Big power sits on SB through staging.
Second hand E-9's are on the point of The Shrimper.
A pair of 6 axles will lugging the grain drag.
In the rear, a rainbow mix of KATY power will be pulling
their SB FPPX loads.
                                                                                                                    
A nice line-up in the NB staging.
L to R; Amtak's Rebel, RI FP7's on a through freight, 
a MoPac freight and a SBD Auto rack detour.


El Dorado
Ready for the day's work, everything is fueled and ready.
The drone of the idling motors fills the air as the crews
get their last cup of coffee.
A pair of leased Frisco MP15DC's will have yard duty today.

A yard full of out-bounds await their departure.


Monday, July 8, 2013

Back to the trains...


OK, enough about my boring life, let's get back to the trains.
Last Saturday night Doug came over and together we worked on some minor projects for him: Installed a TCS CN decoder in one of his locos, swapped out a couple of SD45 chassis so he could try selling them, repaired an Atlas U23B that he got of the Bay that was in sad shape, but he got it for a good price.  We were able to revive it with little to no cost so he came out OK with the deal and then reprogrammed a few of his locos.

While he was working on his projects, he also helped me get the tracks cleaned in preparation for ops session #6, one that I wanted to have back in May!  But as it goes with all things, something more important always seems to pop up.  You know what I mean, the little pesky things like wedding and remodeling, ugh!
The only thing that is left to do is re-MU all the locos [as I cleared them out back in April when a buddy was showing me how to use some of the nice features in JMRI to do maintenance during an ops session].  Then clean the wheels and we should be ready to roll!

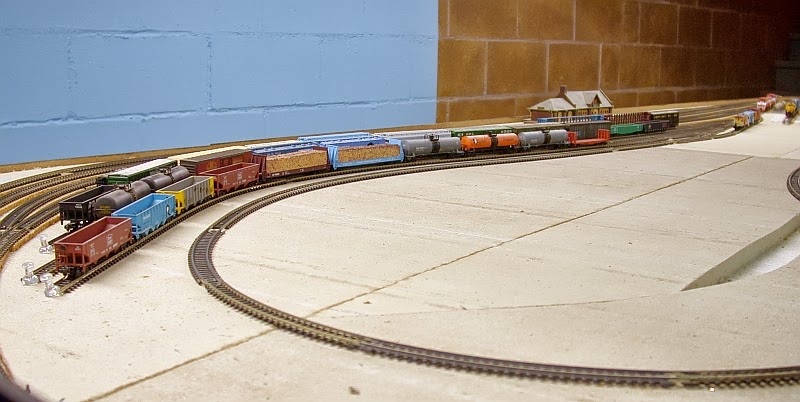
 As far as progress on the actual layout goes, nothing much has been accomplished since the last posts on the work I did at Malvern, where I started with scenery, specifically the ballast and backdrops.

There are several things that I'm really looking forward to with this upcoming session.
1) Malvern will have a little bit of scenery other than bare ceiling tile.
2) I get a chance to play with my updated and improved Wheel Report thanks to Steven Johnson [Owner of the The Rock Island: Ottawa Sands in N Scale]  Steven was gracious enough to take the time out of his busy schedule after Christmas to work with me and automate my Wheel Report.  Now with a simple push of F9 on the keyboard, the entire spreadsheet fills out all the industry needs with one push!  It is sooooo sweet!
Thanks Steven.
3) Since the last session [last October] I have added to my Rock Island diesel roster.  This means that I can retire or return some of leased power.  This a personal goal that I want to achieve.  After seeing layouts and Modular setups with locos of every road and every era, I'm looking forward to seeing an 85-95% solid roster of RI units, but that will be a ways off yet, but I'm gaining on it.

Some of the new units are:  Two ex-UP E8 A/B, two RI U30C's, one ex-DRGW GP7 and two Rock Island FP7's that were recently acquired from Steven Johnson when he recently decided to thin his herd a bit after the decision to rebuild his layout was made.  Once again Steven, Thanks!

Another thing that I want to do during this session is to take some photos so I can post them to the blog
as per request.  With the smart phone that I now have glued to my side, this should be a little easier to do.

So hopefully in a few weeks before starting on the Kitchen remodel, the trains will be rolling.


Tuesday, June 4, 2013

Married Life; One month and counting


Well it's been just over a month since my single life ended, so far so good.
For as Long as we've been dating, it doesn't feel much different other than she's around all the time now. Which isn't a bad thing as the house doesn't seem as empty as it did after my room mate moved out four years ago.

Unfortunately I haven't had much time to work on the layout as the remodeling has taken a little longer than expect, which is usually the case.  As of now the living room is about 95% finished and we're waiting on the electrician to install a new circuit and outlets [not a push Sparky!].  He just bought a new house and has his hands full as well.

I'll get some pics in a while.

Once I get Lisa settled in I plan to take a break before starting in on the Kitchen remodel [I would like to have that project done before the snow flies].  In the meantime I want to get a few little nagging modeling projects wrapped up that's been sitting on my workbench and then try for that ops session yet. 

Nothing has changed enough in my life that will warrant any plans not to continue with the layout and/or the blog, but it might be awhile before I can accomplished anything on either at least until this fall.  Somethings just can't wait...

Saturday, April 27, 2013

The Locomotive bells have been replaced....


....with wedding bells for today!


Today is the the last day of my single life after 49 years.
I finally found a worthy crew member.


Thursday, April 18, 2013

Another sort of modeling


That would be RE-modeling...

All work on the layout has come to a complete stand still for a couple of reasons: One, the upcoming wedding and Two, remodeling the house.

The last two rooms that needed attention for a few years are the Living room and the kitchen.  We got started on the Living room several weeks ago just after I posted the last entry to the blog.

To date, the front room has been stripped of all the old casing and trim, the old paneling has been removed and we spent the last week or so patching any holes and painting and the Living room, it also got a new ceiling in the process.

I really like Ash woodwork and it's next to impossible to find Ash on the open market that's milled for any casing or trim these days, so I ordered in some Ash lumber and had it run by a local mill shop.  We got it stained about a week ago and yesterday I got the finish sprayed on the custom trim.  It's now ready to be installed.

The last thing to do in the living room is to tear up the vinyl flooring and sub-floor, then replace the sub-floor so it's ready when the new vinyl arrives.

The carpet and vinyl flooring is on order so I have about a week to get the old floor vinyl tore out, install the new sub-floor and prep it.

The house was built in 1952 and it's so obvious by just seeing the colors of the paint under the paneling and along with the many layers of wall paper.  Wall paper....Yuck!

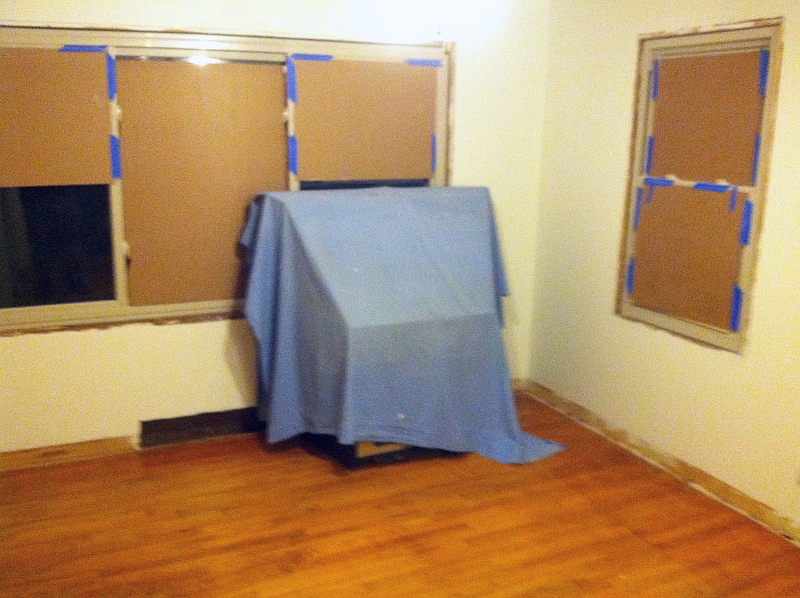
Here's a few pics of the process, this is what I started with;


Removing the Paneling


 Pretty Green and Teal Blue!


I got rid of the ugly 50's paint, got the walls painted white [although you would never know it with my crappy phone pics....lol ] and got the carpet ripped up!


Giggity Giggity


Once I get the sub floor cut and stapled for the linoleum, the next thing is to get the window casing, base and door jambs installed!  The carpet and linoleum is on order.  

Almost there...


Saturday, March 23, 2013

Ballast at Mavern is Complete.

It took a little longer than I expected, but it all came together as I had hoped.

I'm happy with the outcome of using the paper wads that I used to protect the points from the paint; Absolutely no paint what so ever had to be cleaned or scraped in the painting of the track.  As for using the oil to keep the glue mix from getting on the hinge points, springs and throw bars; the turnouts work as good as they did before ballasting.  I only had to apply a slight amount of pressure to break what little residual glue had dried around the throw bars themselves.

Using a drop of the heavier oil on both pockets in the stock rails where the point rails rest, successfully kept the glue from creating a film and insulating the points.  Now all I need to do is to take a lightly dampened "Q" tip with a thinner and wipe away any remaining oil from the areas so they won't gather dust and dirt and cause other problems.

One lesson I learned after ballasting the first turnout was to spread the ballast first!  Then apply the oil.  This kept the ballast from sticking to the rails and points while spreading it.  


I decided to use some old ballast that I had mixed up years ago for the ballast in Malvern, I still wish I could remember what colors I threw together.  It's a nice mixture of at least two or three colors that I had left over.  I really liked the resulting colors.  Since I didn't have enough to cover the mainlines and couldn't quite match the colors again, I decided to used it for Malvern.  It looks to me like what an older ballast might look like after years of no maintenance, kind of a brownish gray.

Speaking from my re-written history book, since the track had to be relaid for the junction at Haskell and the mainlines had actually received some maintenance,  I wanted to use different colors of ballast to help visualize this change.  I chose a mixture of  1 part Fine Gray, and 1 part Fine Gray Blend.  I tried using just the Gray blend by itself and it was too stark and kind of light.  Then I tried using just the Gray, that looked too solid like there was no texture at all.  I wound up using a mixture of  half and half,  I figured the final mixture would be something like 2 parts Gray to 1 part Light Gray.  The light gray gave me just enough contrast to give the illusion of texture.


Since the engine facility had been installed only a few years ago, I used the gray blended ballast here as well.


Since I'm not a fan of gray ballast, my next thought is to make a wash of acrylic brown/black paint which I hope will tone the gray blended ballast down and give it a dusty, slightly dirty look.  I did actually test this method on some scraps of track before applying any of the gray/ gray blended ballast.  The preliminary results looked pretty good.  This will be my next project.

Another little trick that I tried was using the handle of a larger brush to tap on the rail head to help settle the ballast in place, this also did a nice job of keeping the ballast from setting on top of the ties.  I don't remember where I read this from, but it worked very well.

I did manage to get the pad constructed for Heavy Metal, Ind. as well  I used the same method that I did for the engine facility and for Olin Corp.  Only this time I didn't make the pad as thick [or tall] as I did before.  I started out using .040" thick plain styrene which was the same thickness as the base plate for the overhead crane supports.  On one of the pieces for the crane pads I scabbed a larger piece of plain styrene to it using a strip of .020" styrene on the bottom, then glued down more of the .020" strips around the bottom, outer edges to keep the pad level.  I also applied strips of .020" to the other crane pad so they were the same thickness.

After getting the pads ready, I built a pair of the support beams so I could properly space the pads.  Once  positioned I taped them in place and finished spreading the ballast on the siding for Heavy Metal.  Tonight when I removed them, they just popped right up and I now have an nice area formed by the ballast to help relocate the pads when it comes time to glue them in place.  I'm also going to try and scribe lines in the plastic pad so as to represent control joints since I used plain sheet styrene.


With the ballasting all done, the scenery can now continue in earnest.    Finally!

I did get the tracks all cleaned and was able to run a loco with only a few minor issues, nothing a little solder won't fix.

As always, thanks for following along with me.

This will probably be the last major post for a while as my single life will be ending at the end of April.  After 11-1/2 years of dating, I'm happy to announce that Lisa and I will be tying the knot!  I'll continue work on the layout, but at a much slower pace than I have been recently as two other projects will need my immediate attention.  As you are reading this, I'm in the process of remodeling the front room so I can hopefully get it done before or shortly after the wedding and when that mess is finished, the Kitchen will be the next item on the list!  Neither of these projects are on the "Honey Do" list,  it's just that I've kept putting them off over the years.


Sunday, March 10, 2013

Concrete work at Malvern.


The ballast work is just about complete in Malvern.  But before I can finish it though, I need to get some foundations installed for some of the buildings.  The first one installed was for the tank car loading platform at the Olin Corp plant. 


The second one is the pad for the W&OV's engine facility.


I contemplated pouring the foundations at both locations, but decided against this method because I remembered from years ago that when it came time to clean the rails, one slip and the off comes the paint or you dig into the plaster.

So this time I used styrene for the concrete.  I glued some strips of .080" styrene to the bottom side which will keep the pad surface about .020" below the railhead. So with a little care I should be able to clean the railhead without removing the painted surface.  Although accidents will happen.....

The last pad I have to install will be one for the unloading area at Heavy Metal, Inc. then I can finish with the ballasting work in Malvern.

At the same time I'm also trying to decide on a color of ballast for the W&OV engine house and the tracks that lead into Malvern from Haskell.

Since these tracks are relatively new [according to my re-written history] my hopes are to make the ballast look fresher at the W&OV facility as well as the tracks leading into Malvern since they were recently re-worked at the junction and newly laid at the engine facility.